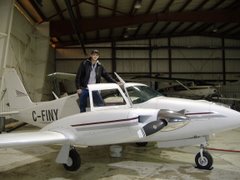
Fall air is definitely here. I can smell that crispness in the air, and I'm starting to have to bundle up as well. I always bring more sweaters/coats then I have to because you never know how cold it might be 150 miles north, and it wouldn't hurt to have an extra layer of clothes handy if I end up on an unplanned night of camping in the middle of nowhere.
A few days ago I took the Twin Comanche up for some circuits. Its been a few weeks now since the engines have been fired up, and I had a bit of a craving for some twin flying. I just went up for 3 circuits, about a half hour flight which satisfied my fix and gave the engines a good workout. At one point there was a Dash-8 inbound and the radio service advised them that there was a "Cherokee 6" in the circuit. I almost felt like correcting them, but it was my last circuit, and in the big picture my airplane type didn't matter a whole lot in that situation. In the past they've also advised other traffic of a "Twin Comanche" when I've been flying the Cherokee. Its obvious they've made the connection that its the same pilot that flies the two different airplanes, and they key on the sound of my voice I suppose.
Today is the Thanksgiving Monday, and I had a couple flights today, so I didn't get a turkey dinner. Not that I would have if I didn't fly. To be honest its getting a little tiresome living up here being away from friends and family, and not having much to do other than rotate between watching TV, reading, and playing on the computer in my days off. I'm still really enjoying the flying, and I'm going to miss it over the winter, but despite that I'm counting the days on when I'll be home for the winter. I will get my fix of flying over the winter though in the form of IFR training. This winter I REALLY have to finish up my Instrument Rating. If I don't, my INRAT exam will expire and I'll be back to square one with that. I also want to have a shot at a twin-ifr job as well. I have almost 1200 hrs total time now, most of that being PIC time, with almost 200 of that being multi-PIC time as well, so I think I've got a pretty good shot at finding something half decent - hopefully. I'm sure how much good another year of single-engine VFR flying will do career-wise for me. I guess we'll see how it all plays out. Hopefully the industry gets a bit more momentum that it got this last spring.
My first flight today was a couple passengers to the usual destination up the coast. The weather was pretty good with only a broken-scattered layer at around 3500 ft, so enroute it was smooth sailing. When we were loading the airplane my boss mentioned with a bit of a wink in his eye that they didn't seem to have much stuff. Usually passengers load the airplane up stuffed to gross weight to get the most out of what they're paying for the charter. If they don't stuff the airplane, its sometimes a hint that the cargo they do have onboard MIGHT just be helping to pay for the trip in the form of contraband liquor. A couple weeks ago I took one passenger up the coast to the community across the river from the one I was going to today, and this one passenger only took with him 4 boxes and 1 50 lb bag of potatoes. Unfortunately for him, his daughter who was supposed to meet him at the airport didn't show up, so he took off to go hunt her down, and in the meantime, the local police showed up and searched the airplane. Turned out ALL of his boxes were nothing bud bottles of hard liquor. By the time they were finished all he had left that wasn't confiscated was his sack of potatoes. It was hilarious. In that case it was ridiculously obvious that he was trying to smuggle liquor. No one legitimately chartering an airplane only brings 5 small pieces of luggage and themselves with them, it just doesn't make financial sense. One of the officers there mentioned that catching that load before it got distributed meant avoiding lots of headaches. He said that 70% of the violence and trouble they have to deal with up there is a direct result of alchohol.
In the case today, there were two people going up, and they didn't have a ton of stuff, but they did have more than a few pieces, so I didn't think anything of it. Apparently my boss picked up on it though, since he made that comment. When we pulled into the ramp after landing sure enough there was a whole convey of vehicles waiting for us. There was a local police truck, an OPP SUV, and my passengers ride waiting for them. This was only the third time since I've been up here that the police in this town have shown up to search a suspected bootlegger flight, usually the local police don't seem to be that hardcore about searches, not in this community at least. The OPP are pretty hardcore though, you know that if they show up something is going down.
So we unloaded the airplane while all the vehicles surrounded the airplane and they all went to work at opening up the bins and boxes and rustling through the stuff. They also searched the passengers themselves, and I looked over laughed and shook my head when I saw one of the passengers with their foot up on the horizontal stab with her pantlegs pulled up and a bottle of vodka taped to her shins. Where am I. Actually they found quite a bit. By the end of it I counted around 14 bottles of vodka, and another 25 or so bottles of some sort of low-alchohol content cooler-type beverage. Quite the load. I figured the street value of all of that would probably be around $2000. So much for the profits they were hoping for, haha. Usually the cops just confiscate the alchohol and drive away, but this time in addition to the liquor, they also apparently found baggies of weed. Now they were in trouble. Long story short in addition to having the contraband confiscated, they also both got arrested. Well, sucks to be them, lol. Good thing this time we got paid for the flight before we took off. Once all the commotion had finished and the vehicles and people were safely away from the airplane, I started up and I was off heading back home for my next flight.
Showing posts with label Twin Comanche. Show all posts
Showing posts with label Twin Comanche. Show all posts
Monday, October 12, 2009

Sunday, March 29, 2009
Preparations to Leave
So yesterday James (my Aircraft Mechanic friend) and I finished off the Twin Comanche's annual. There were surprisingly few snags, and the one big snag I was expecting turned out to be not so big after all, which is always a pleasant surprise.
The left auxiliary fuel tank was leaking, and I suspected it to be the rubber fuel bladder itself that maybe dried out and cracked, so we started by opening up the top wing panel to inspect the rubber bladder. After inspection however the evidence seemed to point to a leak somewhere from the center of the plane, under the cabin floor, which is where the fuel selectors (to select which fuel tanks to feed from), and the gascolator system is located. A gascolator is a device that extracts water from the fuel system to prevent it from getting into the engine, which could cause an engine failure. It sounds pretty fancy, but in keeping with most aviation technology its actually quite simple. Water is heavier then fuel, so if you mix the two together you'll find the water at the bottom. The gascolator is simply a small bowl at a low point in the fuel system. The fuel line comes in near the top of the bowl, and then leaves near the top. The bowl stays full of fuel, and any water that gets into the system flows through the bowl and then sinks to the bottom, where it can be manually drained.
I didn't fly the Comanche much during the winter, and at some point water accumulated in one of the fuel lines going into the gascolator, and froze, which split it open, and caused the leak. Replacing a fuel line is much easier and cheaper then replacing a rubber fuel bladder, so I was happy.
Another thing was that the landing gear bungies were due to be changed (every 3 yrs or 500 hrs), so we had to change those. These are just bungy cords, about 3/4" in diameter that are rigged to assist the landing gear in coming down and staying down and locked, especially in the event that the pilot has to manually extend the landing gear if he has landing gear problems. Once again a fine example of aviation technology. You can just imagine the engineers discussing that one when designing the airplane:
Lead Engineer: Okay guys, we need to come up with a way to make it easier for the landing gear to come down.
Engineer #2: Rubber bands. Hundreds of them stretched around linkage in the wing to pull the gear down. Simple and effective.
Lead Engineer: Perfect, I'll head down to Business Depot and grab a bag.
So we changed the bungies, completed a bunch of gear swings to make sure it all worked properly, and that was that. Despite all the simple technology in airplanes, it still amazes me how many moving parts, mechanizms, and systems there are in an airplane. While I don't necessarily consider turning wrenches a great way to spend a weekend, its pretty cool to open up and dig into the guts of my airplane every once in a while. Its fascinating to think about how much stuff is going on mechanically when I'm in the cockpit pressing buttons and throwing switches as we're hurtling through the sky. Its really quite impressive how reliable these machines are, taking that into account.
I didn't get a chance to take it on a test flight today since the weather was no good, hopefully tomorrow I can take it for a lap and check everything out ok before I head out over the Ontario wilderness. I finally got the call from my employers, and I'm to head up on Thursday, weather permitting. Stay tuned.
I've also been purchasing some small toys under the guise of "survival gear". I bought a magnesium firestarter, a small handheld compass, a stainless steel waterbottle (for everyday use but the steel also means I can use it to boil water in a survival situation), and this styling mosquito jacket. The jacket is basically a pull over jacket made out of mesh material to prevent insects from getting near my skin and biting. It has a hood/mask that completely encloses my face with a little zipper at the neck to flip it off if I don't want my face enclosed. Its stylin.
So I'm pretty well ready to go, just waiting until the appointed time.
Tuesday, March 27, 2007
Little green dots
We went flying on Monday. From the heat of the day there were scattered spots of convective activity popping up all over southwestern Ontario. When you hear convective activity think potential thunderstorms. There was a line of activity north of London running from Stratford all the way to the Hamilton area, and there was also a line developing south down near Chatham as well. When I talked to the weather briefer he mentioned that London and Sarnia were ok for now but thunderstorms could easily start to pop up there as well.
We did our usual flight to Sarnia to fly some ILS approaches, and the weather turned out to be a non-event for us, as there was a wide corridor of clear skies running from Sarnia to London. But we did get to fire up our fancy stormscope which I haven't had a chance to see working yet. For those unfamiliar with such a device, a stormscope measures electrical discharges within a cloud and displays them on a little round display in the form of a green dot relative to the position of the aircraft. How it does this, the best explanation I can give is its magic, but it works. The dots once they've appeared stay on the screen in the same place until the CLEAR button is pushed. They don't move around the display if we make a turn so we have to be sure to push CLEAR everytime we make a heading change, and let the Stormscope start picking up fresh discharges again based on the new relative direction. So if there is convective activity (which produces electrical discharges) within range of our stormscope (25-200 miles depending on the setting) the little green dots on the screen will accumulate enough after a couple minutes that we can make out rather clearly where the good weather is and where the bad weather is in relation to our position. Its really quite fascinating to watch the little green dots start to pile up and clutter the display screen. We could make out very well on the stormscope the squall line over kitchener, and the stormscope also picked up the cell of thunderclouds south near Chatham quite nicely as well. Since it was a clear day we could see the Cumulonimbus clouds building in the distance over Chatham, so we really didn't need a Stormscope to tell us to stay away from there, but the beauty of this instrument is if we were flying in IMC (or even just marginal VFR) and weren't able to see a great distance in front of us, we'd be able to detect any embedded thunderclouds in real time and effectively navigate around the bad spots.
There are two other types of weather detection equipment in common usage. There is the onboard weather radar, which usually has a dome mounted in the nose of an aircraft. This dome picks up the echo's of the radar signal off of any precipitation ahead of the aircraft, and can thus show you where the heavy spots of rain are, thus indicating thunderstorms. These units however are rather large, and expensive, and for the most part are only used on larger aircraft. The other type is also weather radar, but it draws its information from ground based radar stations and relayed to the aircraft by satellite. This is known as XM WX Nexrad Weather. Or just XM Weather. Or just Nexrad Weather. This type for the most part only requires a GPS unit capable of receiving it (with a small current paid subscription), and is thus relatively affordable compared to onboard weather radar, while achieving similiar results. It does have a few minor drawbacks however. Weather information on Nexrad weather is limited to the geographical regions that are covered by a working ground radar station. It is also dependant on a solid GPS signal. It also must be noted that the information given is not in real time. New radar images are transmitted to the GPS units every 15 minutes or so. This means with this system if the weather changes quickly, you'll no longer have an accurate picture, and weather can change very rapidly, especially when we're talking about thunderstorms.
The pros to weather radar of any type is that it is more useful all year round, and it will pick up precipitation of any kind - rain, snow, freezing rain. That is something our Stormscope cannot do. Save from installing a $30,000 onboard weather radar system in our little Twin Comanche - impractical if no impossible - it gives us some pretty good capability. It shows us a clear picture of up-to-the-second dangerous weather in real time, without being dependant on technology outside of the cockpit. Pretty dang cool if you ask me.
Thursday, March 1, 2007
Gear Up Now or Later?
I went flying for the first time with my new instructor, Frank. I know Frank from the flight school in Sarnia, but he is now working here in London. It just so happens that I need a freelance instructor to train me for my IFR, and it just so happens that Frank has his IFR and is willing to do that.
It was a beautifully clear day, free of any turbulence whatsoever, and we decided just to do some circuits to give me a break from the intensive engine-out training I have been doing, and to give Frank a chance to familiarize himself with the airplane. Everything went well, but he mentioned something about the retraction of the landing gear on take-off that we had learned differently. The take-off procedure I had been following based on the recommended procedures in the POH and according to what I had been taught were roughly as follows: Rotate at 80 mph, accelerate in ground effect until Vy (112 mph), climb out at Vy, retract gear when there is no longer enough runway to land, set climb power. Frank, who learned in the Seminoles at Empire Aviation, mentioned that I should retract the gear to get cleaned up as soon as we verify a positive rate of climb.
These two different techniques have two different underlying philosophies behind them. The technique I have been using, where we retract the gear as soon as we run out of runway, uses the philosophy that if we have an engine failure, and we still have a chance to get back onto the ground and stop, do it, even if we're already airborne. Once we've retracted the gear then we're committed to going flying. The philosophy behind Frank's technique, is that as soon as we start the climbout, we've committed to being airborne, so we want to ger cleaned up as quickly as possible to minimize the chances of an engine failing while we still have junk hanging out under the airplane.
Thinking about these two different ideas I realize there's pros and cons to both techniques. My technique reduces the chances of us having to successfully fly an entire circuit on only one engine, which historically, has proven difficult for many pilots. The con would be that it requires very good judgement on just exactly how much runway we need to sink back down, land, and stop - especially if we've climbed a fair amount above the runway. That can definitely be difficult. Underestimate the airplane's required distance to stop and we end up in the weeds past the runway. The other technique makes the decision making easier: Positive rate of climb, retract the gear, ok we're going flying no matter what. But it makes the assumption that the pilot will be able to maintain control of the airplane and make it climb in the current conditions. Light twins are notoriously bad in the single engine climb performance. The single engine climb performance of the Seminole at gross weight and sea level is listed as 212 fpm. That is not much to work with. The Twin Comanche is only marginally better at 260 fpm (with only two of us onboard during training I've seen up to 600 fpm). That is assuming proper pilot technique - climb at Vyse (aka Blue Line), with gear and flaps retracted. The second technique also just ignores any runway left over, which in reality isn't the safest action. If you have enough runway its safer to land then to try and climbout, fly the circuit, and return for a landing.
I guess the risk-reward is different too, at least if the engine fails at the initial stages of take-off. The technique I have been taught carries a lower risk, lower reward. If I misjudge the distance needed to land and stop, I may end up over-running the runway. The airplane may be wrecked, but chances are I'll be ok, since we're just rolling off the runway. The other technique carries a higher reward, higher risk. If done properly, the airplane as well as everybody onboard will be just fine, but it may require a higher degree of skill to acomplish. Any mistake, and the results could be ugly.
Of course if we're operating from a shorter runway where there's not much left-over after we become airborne, the two techniques essentially become the same, and there's no argument. With long runways like at London however, I like the technique I have been taught and I think I'll stick with it.
Wednesday, January 10, 2007
How different wing types affect handling
The shape of an airplane's wing can do a whole lot for how an airplane performes, and handles. Aircraft designers take into the account the aircraft's mission: Trainer, cross country machine, aerobatic aircraft, or in many cases some combination between two, or all of those categories.
 The wing camber refers to the shape of the wing if you were looking at it from the end. A high cambered wing is very curved on the top, and thick from top to bottom, whereas a low camber refers to a very flat wing. A common misconception is that a high cambered wing produces more lift. While this is right I suppose in a roundabout way, that specific wording is rather misleading. The thicker camber improves airflow at high angles of attack, therefore a thicker wing will be able to fly at a higher angle of attack without stalling. The higher angle of attack is what actually produces more lift. Camber can also be on the bottom of the wing, which improves airflow when the wing is inverted during aerobatic flight. A camber is NOT required to produce lift. Another flat out wrong concept that is taught is that the air on the top of the wing has to meet up with the air on the bottom. That's not true, in fact, since the air on the top is accelerated, it actually ends up further back then the air on the bottom. This is due to a concept called circulation, which I am not going to take the time to explain. For more information, check out this great website.
So a thicker camber has two effects: It allows the aircraft to fly at higher angles of attack which produces more lift - and it also increases drag. A thinner camber is just the opposite, less lift, less drag. The more lift a wing produces, the slower the stall speed will be.
The wing chord refers the distance between the leading edge and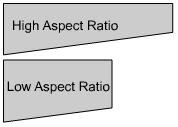 trailing edge of the wing. And the aspect ratio refers to the ratio between the wing chord and wing length. A high aspect ratio, between a long, thin wing (from front to back) actually produces LESS induced drag (drag produced as a side-effect of lift) then a low aspect ratio wing. That's why you always see gliders with incredibly long, thin wings, to produce the most lift possible with the least amount of drag. The shorter wing in a low aspect configuration generally gives greater roll rates, and the shorter wing means stronger construction.
There is one last term we'll go over before we start putting together all these different aspects of wing design together. That is wing washout. A washed out wing has a certain amount of twist built into it. The farther you get to the tip, the more the wing is twisted with its leading edge down. What this serves to do is increase the angle of attack of the wing near its root, and decrease it near the tips. Now if you remember, a wing will stall at a certain angle of attack, usually around 16-18 degrees (depending on the camber). That means that if the wing root has a greater angle of attack, it will stall first, and then the stall will work its way out to the tips. This has two advantages: The ailerons, which are on the outermost portion of the wing, will still have an affect even when the innermost portion of the wing has stalled. This helps to maintain control of the aircraft. Also, it makes for a much gentler stall when part of the wing stalls first, and the stall works its way across the rest of the wing. This is preferable to the entire wing stalling at the same time, and dropping like a rock. Nearly all wings have some sort of washout designed into them, and its disadvantages, as far as practical flight handling goes, are negligable. Therefore this is far as they will be discussed at this point.
Airplanes designed as a high speed cross country machine usually use high-aspect ratio, low camber wings. The long slender, thin airfoil gives lots of lift and very little drag; perfect for efficient cruising, however the sacrifice is made in slow speed handling and can often be tricky to l and. The thin camber generally gives abrupt, unforgiving stalls at higher airspeeds then a thicker camber, and the minimized drag means it takes a long time to slow down. This requires more planning during the landing phase. It also means that if airspeed is not precisely controlled, a too fast approach will cause the airplane to float in the flare, chewing up runway until the airspeed dissipates. The Piper Twin Comanche, and any Mooney aircraft are great examples of high-aspect, low camber wings.
 The wing camber refers to the shape of the wing if you were looking at it from the end. A high cambered wing is very curved on the top, and thick from top to bottom, whereas a low camber refers to a very flat wing. A common misconception is that a high cambered wing produces more lift. While this is right I suppose in a roundabout way, that specific wording is rather misleading. The thicker camber improves airflow at high angles of attack, therefore a thicker wing will be able to fly at a higher angle of attack without stalling. The higher angle of attack is what actually produces more lift. Camber can also be on the bottom of the wing, which improves airflow when the wing is inverted during aerobatic flight. A camber is NOT required to produce lift. Another flat out wrong concept that is taught is that the air on the top of the wing has to meet up with the air on the bottom. That's not true, in fact, since the air on the top is accelerated, it actually ends up further back then the air on the bottom. This is due to a concept called circulation, which I am not going to take the time to explain. For more information, check out this great website.
So a thicker camber has two effects: It allows the aircraft to fly at higher angles of attack which produces more lift - and it also increases drag. A thinner camber is just the opposite, less lift, less drag. The more lift a wing produces, the slower the stall speed will be.
The wing chord refers the distance between the leading edge and
 trailing edge of the wing. And the aspect ratio refers to the ratio between the wing chord and wing length. A high aspect ratio, between a long, thin wing (from front to back) actually produces LESS induced drag (drag produced as a side-effect of lift) then a low aspect ratio wing. That's why you always see gliders with incredibly long, thin wings, to produce the most lift possible with the least amount of drag. The shorter wing in a low aspect configuration generally gives greater roll rates, and the shorter wing means stronger construction.
There is one last term we'll go over before we start putting together all these different aspects of wing design together. That is wing washout. A washed out wing has a certain amount of twist built into it. The farther you get to the tip, the more the wing is twisted with its leading edge down. What this serves to do is increase the angle of attack of the wing near its root, and decrease it near the tips. Now if you remember, a wing will stall at a certain angle of attack, usually around 16-18 degrees (depending on the camber). That means that if the wing root has a greater angle of attack, it will stall first, and then the stall will work its way out to the tips. This has two advantages: The ailerons, which are on the outermost portion of the wing, will still have an affect even when the innermost portion of the wing has stalled. This helps to maintain control of the aircraft. Also, it makes for a much gentler stall when part of the wing stalls first, and the stall works its way across the rest of the wing. This is preferable to the entire wing stalling at the same time, and dropping like a rock. Nearly all wings have some sort of washout designed into them, and its disadvantages, as far as practical flight handling goes, are negligable. Therefore this is far as they will be discussed at this point.
Airplanes designed as a high speed cross country machine usually use high-aspect ratio, low camber wings. The long slender, thin airfoil gives lots of lift and very little drag; perfect for efficient cruising, however the sacrifice is made in slow speed handling and can often be tricky to l
 and. The thin camber generally gives abrupt, unforgiving stalls at higher airspeeds then a thicker camber, and the minimized drag means it takes a long time to slow down. This requires more planning during the landing phase. It also means that if airspeed is not precisely controlled, a too fast approach will cause the airplane to float in the flare, chewing up runway until the airspeed dissipates. The Piper Twin Comanche, and any Mooney aircraft are great examples of high-aspect, low camber wings.
Airplanes designed to have friendlier handling characteristics often sacrifice efficiency and speed during the cruise. Training aircraft like the Piper Tomahawk and many "step-up" aircraft like the Piper Arrow I and II use a low aspect ratio, high camber wing. The thicker camber may limit the cruise speed a little bit more, but these airfoils make for a more docile airplane. Stalls occur at a much slower speed, and are less violent of an event. The drag caused by the thicker profile and 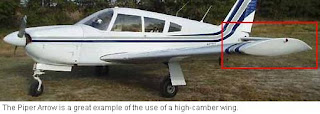 higher induced drag cause the airplane to slow down much quicker, and the short wings will make it sink faster. This makes the landing phase much easier to deal with. Less then perfect airspeed control is not as much of an issue since excess airspeed will be bled off much quicker, giving a greater margin for error.
 higher induced drag cause the airplane to slow down much quicker, and the short wings will make it sink faster. This makes the landing phase much easier to deal with. Less then perfect airspeed control is not as much of an issue since excess airspeed will be bled off much quicker, giving a greater margin for error.
If its load hauling you want the high-camber, high aspect wing ratio is the way to go, like on the Piper Aztec. The high camber allows higher angles of attack translating into more lift, and the high aspect ratio helps maximize lift while minimizing drag.
So designers take into account what mission they believe the aircraft primarily be serving in: Trainer, High Speed Cruiser, Load Hauling, or a step-up airplane somewhere in between. And we as pilots can often tell how the airplane will handle and perform just by looking at the wing and understanding how it works.
Monday, January 8, 2007
Mixture Pitch Power, Gear and Flaps Up, Identify, Verify, Feather.
If you read the title then you've just learned the procedure for dealing with an engine failure in a light twin. I went flying on Sunday and we did a couple circuits, then practiced our emergency procedures. My landings are coming along quite well I must say. Out of the four we did I can honestly say I greased two of them, and the other two weren't perfect, but still well within acceptable parameters. Now I need to start working on touching down within the landing zone I shoot for.
My emergency procedures still need some work. The little rhythmic mantra of "mixtures, pitch, power, gear and flaps up, identify, verify, feather" refers to the memory checklist we need to carry out immediately following an engine failure. 'Mixtures' means we push the mixture controls full forward to the full rich setting. 'Pitch' means we set the pitch of the props forward to full fine, and 'Power' means we immediately go to full power. Basically all the levers on the throttle quadrant go forward. After that we want to clean the airplane up aerodynamically, meaning we raise the landing gear and flaps, if they're down. Now we check to make sure there's no engine fire, and 'Identify' the failed engine. To identify we use the phrase "Dead foot, dead engine". That means that since we are now in an asymetrical thrust situation, we're going have to be using a substantial amount of rudder to counter-act the off-balance thrust and keep us heading in a straight line. This means that the foot that is NOT pushing agains the rudder pedals, means that is the side that has the failed engine. Dead foot, dead engine. Now we need to 'Verify' that conclusion with the engine guages. What is the Manifold Pressure and Tach saying? Now that we have verified the failed engine, we need to "Feather" it. Feathering refers to setting the pitch of the props to full coarse, so they're aligned into the airflow to give us the least amount of drag possible. Mixture, pitch, power - gear and flaps up - identify, verify, feather.
At this point in the process we need to do a cause check to try and find the problem. Make sure our fuel selectors are selected on a tank that has fuel in it, electric fuel pumps get switched on in case an engine driven fuel pump has failed, and we'll open the alternate engine intake air just in case the engine has been choked out with some ice. We'll now attempt a restart. If that doesn't work and we're resigned to the the fact that we are now flying on only one engine, we'll secure the dead engine. That means shutting off the fuel pumps, pulling the mixture control and throttle to idle-cutoff, and shutting off the magnetos and any accessories like generators/alternators on the dead engine. We also need to think about selecting the fuel tank on the side of the dead engine to crossfeed into the good engine. This will over time lighten up that wing and help to counter-act the tendancy to turn towards that side due to the asymetric thrust we're dealing with.
And that's it. I still need work on burning that procedure into my brain and into my muscle memory. I need to be able to go through that whole thing quickly and smoothly without the need to think about it. Any time lost during that procedure may mean altitude and control of the aircraft lost. This is especially critical during the take-off phase where I'm still flying low to the ground, and relatively slow. The lives of myself and my passengers may very well depend on how quickly and efficiently I can carry out that procedure - so it needs to be perfect, and taken very seriously.
Onto a different topic. Pilots who don't follow proper circuit procedures, really drive me crazy, so beware, I'm about to start a rant. We were doing circuits in the Twin Comanche at Huron Airpark in Centralia, and we in our left downwind. We heard a garbled, unreadable radio call, which I disregarded because I couldn't understand a word of it. Shortly after, I looked back to just catch the flash of a yellow piper cub pass directly over top of us from right to left, with what must have been less then 200 ft of clearance. He must not have seen us. Now I admit it can sometimes be difficult to spot other airplanes, especially relatively fast ones. He then proceeded to descend down to our height, circuit altitude, and from about mid-downwind, turned right and joined the downwind... from the downwind side! For those unfamiliar with traffic pattern procedures, that is a HUGE NoNo! Its also unsafe. Let me explain why: You don't do that because there could be an airplane in the downwind already and you might not see him thus causing a risk of collision! Hey wait a second... there WAS an airplane in the downwind! US!!! What a retard, pilots like that should not be licensed if they want to disregard the safety of themselves and others out of pure laziness. If I remembered his registration I would have reported him. This maneuver slipped himself to the inside and essentially ahead of us, who were technically first in line to land. Despite the fact that he managed to land and clear the runway in enough time that it did n't affect us, that is still VERY poor airmanship, and also very rude. Ok I'm calm now. The proper way one should enter the circuit from the downwind side of the airport (in a left hand circuit) is to angle your approach a ways to the left of the airport, then join the downwind leg straight in. Note the green arrows in the diagram. The red arrow is the path the menacing HACK took. This is a good example of why we always have to keep our eyes outside the cockpit and looking around. Sometimes the only person you can trust to maintain a level of safety is yourself.
My emergency procedures still need some work. The little rhythmic mantra of "mixtures, pitch, power, gear and flaps up, identify, verify, feather" refers to the memory checklist we need to carry out immediately following an engine failure. 'Mixtures' means we push the mixture controls full forward to the full rich setting. 'Pitch' means we set the pitch of the props forward to full fine, and 'Power' means we immediately go to full power. Basically all the levers on the throttle quadrant go forward. After that we want to clean the airplane up aerodynamically, meaning we raise the landing gear and flaps, if they're down. Now we check to make sure there's no engine fire, and 'Identify' the failed engine. To identify we use the phrase "Dead foot, dead engine". That means that since we are now in an asymetrical thrust situation, we're going have to be using a substantial amount of rudder to counter-act the off-balance thrust and keep us heading in a straight line. This means that the foot that is NOT pushing agains the rudder pedals, means that is the side that has the failed engine. Dead foot, dead engine. Now we need to 'Verify' that conclusion with the engine guages. What is the Manifold Pressure and Tach saying? Now that we have verified the failed engine, we need to "Feather" it. Feathering refers to setting the pitch of the props to full coarse, so they're aligned into the airflow to give us the least amount of drag possible. Mixture, pitch, power - gear and flaps up - identify, verify, feather.
At this point in the process we need to do a cause check to try and find the problem. Make sure our fuel selectors are selected on a tank that has fuel in it, electric fuel pumps get switched on in case an engine driven fuel pump has failed, and we'll open the alternate engine intake air just in case the engine has been choked out with some ice. We'll now attempt a restart. If that doesn't work and we're resigned to the the fact that we are now flying on only one engine, we'll secure the dead engine. That means shutting off the fuel pumps, pulling the mixture control and throttle to idle-cutoff, and shutting off the magnetos and any accessories like generators/alternators on the dead engine. We also need to think about selecting the fuel tank on the side of the dead engine to crossfeed into the good engine. This will over time lighten up that wing and help to counter-act the tendancy to turn towards that side due to the asymetric thrust we're dealing with.
And that's it. I still need work on burning that procedure into my brain and into my muscle memory. I need to be able to go through that whole thing quickly and smoothly without the need to think about it. Any time lost during that procedure may mean altitude and control of the aircraft lost. This is especially critical during the take-off phase where I'm still flying low to the ground, and relatively slow. The lives of myself and my passengers may very well depend on how quickly and efficiently I can carry out that procedure - so it needs to be perfect, and taken very seriously.
Onto a different topic. Pilots who don't follow proper circuit procedures, really drive me crazy, so beware, I'm about to start a rant. We were doing circuits in the Twin Comanche at Huron Airpark in Centralia, and we in our left downwind. We heard a garbled, unreadable radio call, which I disregarded because I couldn't understand a word of it. Shortly after, I looked back to just catch the flash of a yellow piper cub pass directly over top of us from right to left, with what must have been less then 200 ft of clearance. He must not have seen us. Now I admit it can sometimes be difficult to spot other airplanes, especially relatively fast ones. He then proceeded to descend down to our height, circuit altitude, and from about mid-downwind, turned right and joined the downwind... from the downwind side! For those unfamiliar with traffic pattern procedures, that is a HUGE NoNo! Its also unsafe. Let me explain why: You don't do that because there could be an airplane in the downwind already and you might not see him thus causing a risk of collision! Hey wait a second... there WAS an airplane in the downwind! US!!! What a retard, pilots like that should not be licensed if they want to disregard the safety of themselves and others out of pure laziness. If I remembered his registration I would have reported him. This maneuver slipped himself to the inside and essentially ahead of us, who were technically first in line to land. Despite the fact that he managed to land and clear the runway in enough time that it did
 n't affect us, that is still VERY poor airmanship, and also very rude. Ok I'm calm now. The proper way one should enter the circuit from the downwind side of the airport (in a left hand circuit) is to angle your approach a ways to the left of the airport, then join the downwind leg straight in. Note the green arrows in the diagram. The red arrow is the path the menacing HACK took. This is a good example of why we always have to keep our eyes outside the cockpit and looking around. Sometimes the only person you can trust to maintain a level of safety is yourself.
Saturday, January 6, 2007
Landing Gear Problems
Last time I went twin flying I got a first hand lesson on mid-air landing gear troubleshooting and procedures. We were practicing slow flight, which involved extending the landing gear, and we didn't get a green light indication. On my Twin Comanche, since its an older airplane, only has one green light to indicate all three gear are locked instead of the now standard three green lights. So we didn't know which of the landing gear was having problems, if any. Most often its a problem with the indicating system, not the actual gear. In this case it turned out to be a broken wire in the indicating system, but there was no way to know that in the air, so we took steps to verify where the problem was. First we tried cycling the landing gear through up and down, but that didn't fix it. I could see the reflection of the nose gear in the landing gear mirror, so the nose was down. At this point visions of gear-up landings start flashing through my head, which horrified me, seeing as it was my own airplane I was flying. I really needed to work to keep a calm and rational thought pattern. Richard, my instructor, didn't seem the least bit agitated, so it helped to draw from his level-headedness. We just needed to work through the problem. We unscrewed the indicating lights and switched them around to see if the bulb was just burnt out. No dice. At this point we did a crew briefing on the emergency gear extension handle. There is a panel in the floor between the seats that opens up. Inside is the landing gear worm gear. Manually extending the landing gear is a matter of disengaging the worm gear, putting the handle (a metal bar) into its slot, and pushing forward. This manually pushes the gear into the down position. And must be done slower then 100 mph. Hopefully we wouldn't have to use it.
At this point we were near the control zone, so we called the tower and informed them of the problem and asked for a flyby before joining the circuit. They asked us for the number of people onboard and amount of fuel in lbs we had. They also notified the airport fire department, which had trucks waiting for us when we landed. On the flyby the tower said that all three gear 'appeared' down and locked. They say the word appear for liability sake. We joined the circuit and did our pre-landing checks.
It was a beautiful feeling to touch down and feel the wheels beneath us, and since it all turned out ok, it was a good experience. I got a firsthand lesson in landing gear procedures, and I think it was also really good practice in emotional control. Regardless of the problem its always best to keep a level head and work through the problem calmly and rationally.
Thursday, December 7, 2006
Icing on the Cake
Its snowing out right now, and I can't go flying. Flying in the wintertime has both its pros and cons. Airplanes love cold air. Cold air is more dense, which allows the engine to produce more power. The dense air also provides more substance for the propellers and wings to displace, thus giving more thrust and more lift. In the Cessna 150 these effects are most visibly seen during a climb. On a hot summer day with just me in the airplane I can expect around a 3-400 ft/per min climb, whereas in colder winter weather I've see climbs upward of 600 fpm.
Winter flying also requires more cautious actions to avoid airframe icing. Airframe icing is defined as the buildup of ice on the wings and other surfaces of the aircraft, which can add weight to the airplane as well as reduce lift. In icing conditions, ice most heavily builds up on the leading edges of the wings and other surfaces of the airplane. Ice on the windscreen can impede forward visibility from the cockpit. More importantly, icing on the wings, if appropriate action is not taken, can actually bring an airplane down. The ice changes the shape of the wings, which alters how the air flows over it. This can reduce the amount of lift the wings produce.
All of the larger airliners have equipment to defend against icing, and many smaller aircraft have systems as well. There are 3 different types of ice protection systems, categorized into two different groups: De-icing, which is to remove ice that has already built up, and Anti-icing, which works to prevent ice buildup in the first place. De-icing boots are strips of rubber that are glued onto the leading edges of the wings and other flying surfaces. When ice accumulates on the boots, they can be inflated with air which breaks away the the ice so it falls away. This is by far the most common system employed on smaller business jets and piston planes. Less commonly seen is the weeping leading edge system. Like on the Cirrus line of private aircraft, the leading edge has a grid of tiny holes covering the entire leading edge. When activated, these 'pores' seep anti-icing fluid, which is spread by the airflow over the wing. This fluid prevents water droplets from freezing on the wing. Lastly, and only used on jet aircraft, is the hot-wing anti-icing system. The leading edge is heated from bleed air from the jet engines, which prevents icing from freezing onto the leading edges.
Neither of the airplanes I fly are equipped with de-icing, or anti-icing systems. Additionally, neither aircraft perform particularly well with ice, compared to other airplanes. The Cessna 150 is a very small, underpowered airplane. Do to the lack of power, it would not be able to handle the extra weight and decreased lift as well as more powerful airplanes could. The Twin Comanche, though having lots of power, has what is called a laminar flow wing. Simply speaking, it is critical for this type of wing to have a very smooth surface, free of any contamination. Ice on this wing would change the flow of air very drastically. This means that I have to be very cautious as to the weather conditions I fly into, and as such, I am not going flying today.
Wednesday, December 6, 2006
Landing a Twin
Well here is my post on landing the twin as promised. Hopefully I haven't lost too many people to confusion or boredom from the last post. I promise the next one will be less technical.
So here we are, screaming along in our twin. We've been cleared to the downwind, so now we're flying parallel to the runway in the opposite direction, at circuit altitude, which is 1000 ft above the airport. If we haven't already we'll pull the power back to around 17 " of Manifold Pressure, which is about half power, so we can slow down. We'll let our speed bleed off a little. Now we need to get our pre-landing check done. Mixtures go to full rich, fuel selectors should be on main tanks, electric fuel pumps on, and once our airspeed has dropped below 150 mph, we can drop the landing gear, and we'll watch for our green light, indicating the gear is down and locked. The gear will be slowing us down even more, so now once we're below 125 mph, we can lower the flaps.
At this point, we'll be ready to turn onto our base leg, which is 90 degrees to the runway. We slow down to our initial approach speed which will usually be 120 mph, unless we're following in a slower plane and we need to go slower to give them more spacing. Soon enough we'll be ready to turn onto our final leg, lining us up with the runway. I have to remember to not wait too long to turn, otherwise I'm going to turn too late, and have to do an S turn to get ourselves lined up again with the centreline. This isn't a Cessna 150 and it won't turn on a dime as I'm used to. Final approach speed will be 110 mph. Once we're established on final we do our G.U.M.P. check. G.U.M.P. is an acronym for Gas, Undercarriage (landing gear), Mixtures, and Propellers. This means we want to double check that our fuel pumps are on, and fuel selectors on the main tanks, our undercarriage is down and locked (belly landings are quite exciting I hear but not very cost-effective), Mixtures are rich, and Propellers are full forward. All this, with the exception of the landing gear, doesn't really matter a whole lot for landing, but we want to be already set up to climb out if we have to overshoot for whatever reason. So as long as we've been cleared to land we're good to go. All we have to do is fly the airplane down over the threshold, slowly retard the throttle and flare (raise the nose to bleed off our airspeed and touch down on the main wheels).
The flare I find is a much smaller angle in comparison to a Cessna 150 or 172. The airplane is travelling faster and needs more time to slow down and settle onto the runway. I initially had problems flaring too much, and the airplane would zoom up, bleed off its airspeed, and then drop onto the runway - hard on the airplane and it does a number on your back too! All we need is just a very slight nose up attitude and hold it there until our airspeed decreases and the airplane settles onto the runway. Once we've got all three wheels onto the runway its just a matter of applying the brakes and stopping straight ahead. Onto the ground once more safely and uneventfully, just the way we like it!
Tuesday, December 5, 2006
Flying a Twin
Recently I started training for my Multi-Engine Class Rating, in our newly christened 1964 Piper Twin Comanche. My first flight was quite the shock going from the ambling pace of a Cessna 150 straight to the high speed, high demand cockpit of a complex twin. So I am excited to review what I have learned so far.
Just a heads up, this is going to be a fairly technical post, so those not interested in reading procedures and what-not, sorry. Otherwise read on!
For those of you out there who know what a Constant Speed Propeller is, feel free to skip these next two paragraphs, I just feel compelled to give a little background knowledge to those unaquainted with the complex aircraft.
First of all the term "Complex Aircraft" generally refers to an aircraft with retractable landing gear and a constant speed propeller, or in my airplane's case, propellers plural. A constant speed propeller is one where you can control the pitch of the blades. This gives you an advantage similiar to different gears in a car. A fine pitch in the propeller, similiar to a low gear, will give us lots of torque for the take-off and climb, whereas a coarse pitch, like a high gear, will give us a fast cruising speed.
In addition to a power control (controls amount of air aloud into engine) and mixture control (controls amount of fuel aloud into engine) we have a a set of Propeller controls. These don't directly control the pitch of the propeller blades, but actually control a governor that allows the blades to change their pitch in order to hold a constant engine RPM as directed by the prop controls. Hence the name "constant speed propeller". The governor, based on how much power is being delivered to the props by the engine, will adjust the pitch of the blades to either slow down, or speed up the engine as needed to maintain the set RPM. For example. Say we want to set our props to a cruise setting, and right now we have just finished our climb and are in a fine pitch climb setting of 2500 RPM. We will pull back the prop control levers until the Tachometer reads our desired RPM, which we will call 2300. The governor senses that right now the props are spinning at a faster rate then 2300, so it increases the pitch, which in turn loads the engine and slows it down to 2300. If we were to increase the power being delivered to the props by pushing our throttle forward, the props will naturally want to speed up, so the governor will once again increase the pitch of the props in an attempt to keep them spinning at 2300 RPM. So unlike a fixed pitch prop aircraft where power to the engine is measured on the Tachometer, we measure power from the Manifold Pressure Gauge, in Inches of Mercury, and we manage the prop settings using our Tachometer.
Now that we have a little background knowledge, I can talk about the procedures we use for taking off.
For taking off we use a full fine pitch setting for the props, full power to the engines, and no flaps. The Twin Comanche calls for no flaps in take-off, because we don't want to take off while our airspeed is still below Vmc. In a nutshell, the aircraft will be uncontrollable below Vmc if an engine fails. So we want to stay above that at all times. Once we're cleared for take-off, and we've done our crew briefing and are ready to go, we push the power forward, and hold it on the runway centreline as we're sucked back into our seats. Right at about 80 mph, the airplane stops bouncing along the runway and starts flying. Now we'll accelerate in a level attitude just above the runway until we've past Vmc (90 mph) and reached our best rate of climb, which is 112 mph. At this point we'll pitch the nose up and climb out. As soon as we've run out of runway, which is about 5-10 seconds after our wheels left the ground, we transition into the normal climb. Landing gear goes up, we pull the power and props back to our climb setting, and we let our airspeed increase to around 130 to 140 mph for better cooling for the engines. Not long after, we've reached our cruising altitude, so its time for the cruise checklist. Power once again back to cruise power, electric fuel pumps can go off one at a time as we watch our fuel flow gauge for any decrease in fuel flow. If something is wrong with our engine driven fuel pumps we want to be able to identify which one, and if something is wrong with both of them it would also be really nice to not have both engines quit at the same time, cause that would just make for a bad day. The rest of the cruise checklist is pretty standard. Mixtures lean, fuel tank selectors as req'd (also done one at a time), cowl flaps closed, nav instruments set.
I'll post what we do for landing tommorrow maybe, because this is getting a little long and its also getting quite late, and I have to work tommorrow.
Subscribe to:
Posts (Atom)