Tuesday, October 16, 2007
Re: Good Pilot
Wednesday, October 10, 2007
Good Pilot
While it is true that it takes a great deal of skill to land an airplane, even more so in tricky conditions, such as a short field and/or gusty crosswinds, to judge a pilot soley by his landing is to sell him short of the thing that he has really spent 90% of his career trying to master. A more accurate indicator of a superior pilot comes in what is known as risk management. This is a skill far more difficult to master, far more important then superior stick and rudder skills, and far less visible to the average observer. We say risk "management" because there is always a certain degree of risk when flying. Risk ellimination would be to not go flying. Risk management is minimizing exposure to danger while still completing the flight. There are far more factors and decisions relating to risk management that a pilot must face each flight to list them exhaustively, but I'll mention a few. These decisions start before anyone even steps into the airplane.
Weather Conditions - How safe is the weather to fly in? How might it change during the flight? How do we alter our flight planning to accomodate this (wait it out, change our route, etc)?
The Airplane - Is it mechanically sound? Is anything not working properly? What do we do about it? Is the airplane's performance abilities capable of making the flight (ex. can we take off soon enough to clear those trees, are we within weight and balance limits)?
Flying - Is there any traffic presenting a hazard to us? Where is it? Is this weather presenting an unacceptable hazard to us? If we try to fly through it will be able to turn around if we can't make it? What happens if our engine quits right now? How about now? How about in 10 minutes? What if we have an instrument failure? What are our "outs"? Is the crosswind too strong for us to land on that runway? Is the runway long enough? Even if we don't make a perfect landing? What is that airplane over there doing? Is he paying attention or is he presenting a potential hazard to us?
There are alot of decisions to make relating to safety, and most of the time we have to make them on-the-fly (pardon the pun). Usually the right answers aren't always perfectly apparent. These decisions are of course entirely separate from our duties of keeping the aircraft under control. The bottom line is have we made the flight as safe as it could have possibly been? Granted good stick and rudder skills go a long way to making a flight safer, especially in tricky conditions, but good judgement can compensate for poor stick and rudder skills, whereas good stick and rudder skills can very rarely compensate for bad judgement. Risk management is something very difficult to teach. I believe it is partly a talent, partly a product of experience.
This is not to say that if the next pilot you go flying with makes a smooth touchdown not to compliment him! We still all work very hard to impress our passengers with a comfortable flight. But comfortable is not always synonimous with safe.
Saturday, August 4, 2007
Retractable Singles
Anyways seeing all these retractable singles coming through gets me thinking about what the conventions of flying them would be, specifically, when would be the best time to retract the landing gear? I've never flown a retractable single before, so any pilots reading this who have, I'd been interested to hear your opinions.
When flying a multi-engine aircraft, we retract the landing gear once we've committed to the takeoff, or in the case of a jet where the decision to continue the takeoff (V1) is made while still on the ground, they'd retract the gear once a positive rate of climb has been developed. In a single, there's no such decision to be made. If the one engine continues operating, we continue with the takeoff, if it decides to quit at any time, there's no ifs ands or buts about it - we're going to land. So I suppose the considerations that should be made are:
1) The aircraft will climb better with the landing gear retracted.
2) A landing in the event of an engine failure is generally more survivable with the landing gear extended, whether off airport or on airport.
Keeping these in mind, what makes the most sense to me, is to make the initial climbout with the landing gear extended until you reach a height great enough to allow enough gliding time for the gear to be extended again if you have an engine failure after you rectract them. After you retract the gear it should be a priority to climb as fast as possible to reach a safe altitude.
It is important to note however that landing gear may operate differently with an engine failed, depending on the system. There are three different types of landing gear systems: Fully hydraulic, electric-hydraulic, and fully electric. Fully hydraulic, more common on multi-engine aircraft, this system uses an engine driven pump to power the hydraulic system of the landing gear. An electric-hydraulic system uses an electric motor to power the hydraulic system. A fully electric system, like in the Twin Comanche, uses an electric motor to mechanically operate the landing gear using levers and gears.
It is easy to understand that with a fully hydraulic system, the hydraulic system will stop working if the engine powering it stops working. This is generally not a problem with twins, because they'd normally be equipped with a hydraulic pump on both engines, but if this system is installed on a single, and the engine fails, you're going to have to use the alternate means of extending the landing gear, which would normally be a hydraulic hand pump.
Now I can't actually think of any single engine retractable aircraft that has a fully hydraulic landing gear system, that would be stupid. Most of them have either electric or electric-hydraulic for this reason. I thought it would be interesting to mention however, that the time that should be allowed after takeoff to extend the gear again, should be the time it takes for the landing gear to be extended with the engine failed.
I'd be interested to hear others opinions, because I've been watching these retractable singles taking off, and almost all of them retract the gear immediately after lift-off. I can't help but want to ask them, what would happen if an engine failure occurred immediately after you retract the gear? The result would likely be a belly landing on the runway... an unfortunate and very preventable mishap.
Monday, July 16, 2007
Orillia Ho!
The landing in Orilla unexpectadly turned into a little bit of a high stakes excercise in "how fast can you stop a Twin Comanche?" The touchdown was a little ugly... my fault, but then I noticed up ahead was a healthy flock of seagulls hanging out on the runway. And they didn't seem too concerned about the giant twin bladed bird mulcher bearing down on them. I managed to stop just barely in time, within 50 ft of the flock. You'd think they'd get out of the way. Oh no. I still had to practically shoo them out of the way to taxi by them. Dumb birds.
The traffic coming into London was rediculously busy, and the controller had his hands full. Our first circuit we were number 5 to land, that means there were 4 airplanes flying in front of us coming into land. They were all training aircraft. It was a good VFR day so I guess all 4 flight schools on the field all thought it'd be fun to do some circuits. We were following a Diamond Katana into runway 33 on our approach. For the controller is was a tricky excercise in traffic spacing having a slow Katana in front of a quick twin. I tried to stay a fair amount behind the Katana so I didn't overtake him, but I guess the controller was feeling pressure from the aircraft behind me, so he told me to keep my speed up. Ok, can do. I brought the flaps back up and kept my approach speed a little on the hot side until we came in a little closer. The Katana, apparently with a student pilot onboard, was cleared to land. At this point I was starting to close on him pretty quickly, and it was apparent that I was going to have to overshoot, lest I run him over. It turns out despite being cleared to land, the student pilot was intending to do a touch and go. Long story short: An upset controller, a frazzled student, and two airplanes climbing out off the same runway at the same time. So I had to overshoot, overtaking the Katana to his left. The second approach I nearly had to overshoot again, as the aircraft landing ahead of me took his sweet time getting off the runway. All turned out well though. I just delayed my touchdown a few seconds, and ended up making the smoothest landing ever! No thump, no tire squawk, just the sound of rolling tires and the airplane decelerating.
Made for a fun day, and I felt useful and important.
Thursday, June 7, 2007
Climbing the Next Peak
My landings, although well within the realms of safety, leave a lot to be desired in comparison to when I flew the Cessna 150. In the C-150 it got so that I could consistently put the airplane smoothly down on the runway well within 20 ft of my target touchdown point, even in a strong crosswind. In fact it got to the point where I could do that so consistently it was hardly any fun anymore. I remember back in Sarnia I was doing circuits just for kicks, and my instructor, Jason, was in another airplane holding short of the runway I was on final for. Over the radio he said, "Hey Chad, see if you can touch down right at Alpha [taxiway]." I managed to put the airplane down about 20 ft before alpha, and then have it stopped in time to smoothly turn off the runway onto that same taxiway. I could see Jason laughing incredulously at the fact that I pulled it off as I taxied by them.
This wasn't the case when the ink was still fresh on my license. It was a process to get to that point. At the beginning my landings weren't always silky smooth, and the touchdown point was always exactly where I was aiming. It seems now that I'm flying the Twin Comanche I'm back to the start - where I was with the C-150 a couple hundred and some-odd hours ago. Of course I already knew this, but I'm just reflecting. I'm going to have to work hard again to impress my passengers.
Last night I went flying, and out of my 4 landings that I did (Kitchener, Peterborough, Cornwall, London) I only rolled the wheels on once. We won't even consider whether or not I hit my exact target touchdown zone. Although sometimes after touchdown I cringe and look around to see if any other airplane saw that, its nice to have another mountain to climb. Its a breath of fresh air and I look forward to the challenge.
Thursday, May 31, 2007
Aero Engines #2
Aero engines are I supposed a comprimise between the two, but they definitely lean more towards the simplicity approach. The simplicity approach also has its advantages in the weight department. The less stuff there is tacked onto the engine, the lighter it will be, and that's a critical factor when designing airplanes.
Lets take for example the cooling system on an airplane... oh wait, there isn't one. Well not like a car has one at least. A car has a system of tubes that run liquid through the hot parts of the engine to absorb the heat. The liquid is then piped through a radiator, which cools the liquid by allowing the heat to vent into the air. A liquid coolant system works remarkably well in regulating engine temperature, but how many times over your life have you been driving and had your car overheat? It doesn't happen often, but it does happen - coolant leaks out, rad caps burst, whatever. You pull over to the side of the road. Aero engines are completely air cooled. Its quite simple to explain actually. Aircraft engines are fitted with baffling systems to take in ram air from the plane moving forward and the prop blowing air into the cowl, and direct it over the cylinders to cool it down. Some of the more complex airplanes, like the Twin Comanche, have cowl flaps. These are doors out the back of the engine that can be manually opened and closed to allow the air in the cowl to be flushed out the back of the engine. This keeps fresh constant airflow over the engine, which results in better cooling. We use this in situations where the engine is either working very hard (like takeoff and landing) and needs extra cooling, or during ground operations when the speed of the aircraft isn't great enough to allow enough airflow over the engines. That's all there is to it. I would be hard pressed to explain anything else about aero engine cooling. The cooling system I'd say is pretty reliable, air doesn't break down.
An example of a system that takes the opposite engineering approach would be the magnetos. Magnetos could be described as something along the lines of an ignition coil, alternator, and distributer all wrapped up in one. Magnetos are driven by a shaft directly off the engine. This shaft turns a coil which generates voltage and delivers it to the required spark plug. Magnetos are really nice because they have no connection to any other system on the airplane, so are dependant only on themselves to keep working. In a car, the distributer is dependant on the coil to produce the spark, which is dependant on the battery for its charge, which is dependant on the alternator to continue charging the battery. The magneto bypasses this long line of fallable equipment, so as long as the magneto is working properly, the engine will still run. The magneto is relatively small, only about the size of both your fists stacked on top of each other, but its not simple. So the engine is equipped with two magnetos. Each magneto has its own set of spark plugs running into the engine, and the engine is capable of running on only one magneto. So a four cylinder engine actually has 8 spark plugs. This provides excellent redundancy, as well as better fuel combustion.
The oil systems are virtually the same as cars. There are two different types, the wet sump system, and the dry sump system. A wet sump is simply oil sitting in an oil pan under the engine, which sloshes up and lubricates the pistons. A dry sump is a system where the oil is stored in a resevoir seperate from the engine, and is then pumped through to the parts needing lubrication. Most piston engines use a wet sump system for reasons of simplicity, lightweight, and low cost.
Everything else on the engine is pretty basic once you learn it. There are the accessories driven off the engine like the alternator, vacuum pump (which power some of our cockpit instruments), and fuel pumps on more complex aircraft. For the most part these are all simply bolt on components, similar to a car.
All in all aero engines are incredibly simple compared to their groundbased counterparts. With the exception of a couple brand new airplanes there are no fancy computer parts, no over-engineering. Just a simple, robust piece of machinery.
Aero Engines vs Automobile Engines
My Twin Comanche is equipped with Lycoming IO-320's. All those letters and numbers mean something, so let me break it down for you. Lycoming is the manufacturer. There are two major aero engine manufacturers, one being Lycoming, and other being Continental. The "I" in the engine model number stands for "Injected", meaning its fuel injected as opposed to carbureted, and "O" means the engine is of the horizontally opposed type (O for Opposed). A horizontally opposed engine is where the cylinders are facing directly away from each other, with the crankshaft running down the middle of the engine. In contrast, a car usually has either an inline engine, meaning the cylinders are all lined up in a row, or a V engine, meaning the cylinders are lined up opposite each other (line a horizontally opposed engine), except with a slight upward angle, so if you look from front to back the cylinders make a V shape. The 320 in the model number is the displacement of the engine in cubic inches.
So if we have an IO-320, that means we have a fuel injected, horizontally opposed, 320 cubic inch engine. In this case, its a four cylinder. The model number does not tell you how many cylinders it has, but usually judging by the displacement size you can figure it out. For some of you automobile engine savvy readers, you may be thinking, "Holy crap! 320 cubic inches is a ton of displacement for only a 4 banger!". You would be correct, that's huge. GM has V-8 engines with only a displacement of 305 or 350 cubic inches, and those are considered big engines. The old Ford Mustang has its famous 5.0L engine (302 cubic inches). In the case of aero engines, my IO-320's are considered small. Many slightly larger light twins are equipped with IO-540's (meaning 540 cubic inches).
You might also find it perplexing when you compare the horsepower between the two engines. My IO-320's output only 160 HP each. When you compare it to GM's 350 V-8, which has been known to output easily over 300 HP in many cases, and is not much larger in displacement then the IO-320, there's quite a difference. So what gives then?
The principle reason why the output seems so low on such relatively huge aircraft engines is simple - its the speed at which the engine turns. Car engines can easily rev up to 5000-6000 RPM with no problems whatsover. However an engine spinning a prop doesn't have that luxury. For weight and simplicity reasons, the vast majority of aero engines are directly linked to the propeller - no transmission, no reduction gears. The prop will spin at the same speed as the engine. If a propeller was spinning as fast as an automobile engine does, the tips of the props would be breaking the speed of sound. When something breaks the speed of sound, in a nutshell, a shockwave is produced creating turbulent air around the object. I could go into the physics of that, but for now we just have to know that this can't really be allowed to happen. This is also to assume that the propeller wouldn't shred itself spinning at 6000 RPM.
This means that propellers, and thus aero engines are limited to relatively low RPMs. Therefore aero engines are built to produce lots of power at low RPMS (2700 RPM is usually redline). That's where the massive displacement comes in. Engines with fewer cylinders that are much larger can produce lots more power at low RPMs then something with smaller cylinders but more of them.
I've wondered how this affects fuel economy, but it would be difficult to make that comparison without actual testing, because fuel economy is measured differently with airplanes and cars, and the way the engines are operated are completely different as well. Airplanes for the most part have a completely constant power setting once cruise is reached, whereas a car is always stop and go, even on a highway you have to make slight adjustments to maintain your speed when going up and down hills, and this has a very large factor on fuel economy.
So there's some food for thought, maybe next post I'll continue on what else makes aero engines different then automobile engines.
Wednesday, May 23, 2007
Trust the Instruments?
Below is a picture of the primary flight instruments. Clockwise from the top left is the Airspeed Indicator, Attitude Indicator, Altimeter, Vertical Speed Indicator, Heading Indicator, and Turn Coordinator.

When flying in IMC (Instrument Meterological Conditions, aka "The Soup"), its commonly said that you should "always trust your instruments". This is because its instinct to naturally trust what your body tells as far as orientation goes. When you have no visual cues, its very easy to become disoriented, because the tools your body uses to determine what is up and what is down, can be very easily confused, and what you feel may be up could quite possibly be completely wrong.
As far as the say goes to "always trust your instruments", this is not always very good advice either. While it may be true that the instruments are right 99% of the time, they are still a mechanical fallable device. I think the saying should read, "Never trust your body, and be sure to question your instruments.". The two centre instruments in the picture, the attitude indicator and the heading indicator, are the two instruments that most intuitively show orientation, are actually powered by the same system - the vacuum system. The vacuum system is powered by an engine driven vacuum pump, which keeps a gyroscope spinning. The gyroscope is the heart of these two instruments, and if it stops spinning, these two instruments stop working.
Conviently, the vacuum pump drive shaft is built in such a way that it will shear off if something in it goes wrong. This may seem like a lame idea, but the idea is to protect the engine. Vacuum pump failures can and do happen - I experienced one once flying my Cessna 150. I was flying VFR naturally, so in those situations its more of a pain in the butt and a, "Dang, I wonder how much this is going to cost" problems. A vacuum pump failure through IMC is a little more serious, because that would mean we've just lost two of our better ways of determining orientation and direction, but all is not lost. In fact we can have any of the six instruments fail and we'd still have a way out. Our way out is called an instrument cross check.
The beautiful thing about the six primary flight instruments, is that many of them really have the ability to show two different kinds of information. The second type of information they show may be a little less intuitive, but the information is there. The concern of course is ending up in a spiral towards the ground and not knowing it, or banked at an extreme angle to cause a stall, resulting in a spin. This is where the instrument cross-check comes in.
The airspeed indicator as well as showing airspeed can also show us vertical speed, so can the altimeter. If we were in a nose down dive, the airspeed would be rapidly increasing. If we were in a nose up attitude, the airspeed would be decreasing. Make sense? If the airspeed is holding steady, we know we're holding altitude. The turn coordinator is our backup for bank information. The little airplane on the instrument will roll back and forth to indicate the rate and direction of a turn. The ball in the little glass tube below it will show slip or skid indications. So if the little airplane is level, and the ball is in the centre, we know we're holding our heading. So the airspeed indicator combined with the turn coordinator gives all the information we need for orientation, and our magnetic compass, which I didn't really mention (but we still have) can show us direction (just not as instantaneously as the heading indicator).
Any time we're flying by instruments, we are continuously doing an instrument cross check to verfiy the accuracy of the instruments. "Always question your instruments." If the attitude indicator is showing a bank to the left, but the turn coordinator is showing a turn to the right, or straight flight, we know one of them has failed. The instrument cross check is taught right from the Private Pilot License training. On the Private Pilot flight test, during the instrument flying portion, the examiner will actually have the pilot close their eyes while the examiner puts the aircraft into whats called an unusual attitude - an attitude the airplane will not normally be in, either extremely nose up or extremely nose down, with an element of bank in there as well. The student then has to quickly identify the problem and take the correct actions to recover before the airplane stalls or develops into a spiral. This is all with foggles on, glasses to simulated IMC conditions. The commercial flight test takes it one step further. The same thing is done, except both the Attidue and Heading Indicator are failed, and the pilot has to then recover using only the four remaining instruments.
Instrument failures can and do happen, and it would be foolish to place complete faith in one instrument. Instruments must always be verified by the information given on other instruments, and action taken immediately if a discrepancy is noticed.
Engine and nav instruments can also be cross checked to verify accuracy and identify problems, but I'll make that my next post if any of you found that interesting. Give me some feedback before I launch into another cockpit management related post.
Sunday, May 20, 2007
VFR Weather Minima - What is really safe?
Within Controlled Airspace (Such as within the 5 mile radius designated around many airports)
Visibility 3 miles
Aircraft must be operated a minimum of 500 ft agl, and must remain 500 ft vertically, and 1 mile horizontally from cloud.
Within Uncontrolled Airspace
At Or Above 1000 ft AGL aircraft must remain 500 ft vertically and 2000 ft horizontally from cloud.
Vis during Day - 1 mile
Vis at Night - 3 miles
Below 1000 ft AGL aircraft must simply remain clear of cloud.
Vis during Day - 2 miles
Vis at Night - 3 miles
As you can see, weather minimum in controlled airspace is for the most part stricter then it is in uncontrolled airspace. This could potentially be problematic and restricting if the weather actually is poorer then the controlled airspace minima permits, however we have a nifty little tool available to solve this. Its called Special VFR. Pilots can request Special VFR to air traffic control, and the weather minima for aircraft operating under special VFR is reduced to 1000 ft ceilings, and visibility of 1 mile. This is certainly not good weather! Special VFR can be authorized for both taking off and landing during daylight, but only for landing during nighttime. If we were to visualize these conditions during the day, imagine us sitting at the end of an average length runway of 5000 ft, ready to take off. 1 mile visibility is 5280 ft, therefore we would just barely be able to see the end of the runway. Any traffic ahead would be flying half as high as they usually do in the circuit, at only 500 ft above ground.
The question that may be asked now, is this actually safe? Well, that can still depend on the weather. Other weather considerations need to be considered outside of the defined minimums also. In the winter time, we need to be more aware of icing conditions, but for the most part, that only occurs in cloud, so since VFR flying needs to be clear of cloud, it doesn't really come into place. Thunderstorms in the summer are the bane of small aircraft pilots. Thunderstorms bring severe turbulence, heavy downdrafts, hail, and lightning. All of these can be deadly. Heavy rain resulting in IFR conditions can also be a concern. The good thing about thunderstorms, is unless they are associated with a massive front moving across the country, they generally come and go quickly, so its possible to wait them out or, depending on the size of the storm and speed of the aircraft, we can fly around them.
There are loads of weather data, reports, forecasts, and charts available to pilots. There is weather reporting equipment at nearly every medium-large airport to give us hourly reports on visibility, ceiling, winds, temperature, dewpoint, and atmospheric pressure. We also have graphic charts to depic icing conditions, turbulence, clouds, weather fronts, atmospheric pressure, and winds. There is also weather radar charts and satallite images. These are all available online. We can use these charts to gain an intimate knowledge of the weather of that day, and draw our own conclusions as to what its doing. There is also a system in place to allow pilots to report actual weather conditions they have encountered, so pilots on the ground can get a first-hand report. We also have the option to phone the Flight Information Centre (we have one located in London, that serves nearly all of Ontario). The Flight Service Specialists there are available to brief pilots on the weather conditions if we are unable to access the charts. Their expert opinion can be invaluable.
All these resources can be used to make an informed go-no-go decision, and rarely to we have to depart without having a very good idea of what we are going to encounter. It is impossible to simply define what is go weather, and what is no-go weather, but VFR flights really can be completed safely in some relatively poor conditions. It just requires more attention, planning and good judgement from the pilot.
Friday, April 20, 2007
Exhaust Pipe Installation
I took two days off work to do most of the work myself, with James, my licensed mechanic coworker did the actually inspections and provided me with the guidance I needed.
The new exhause pipes finally came today and so I spent what only amounted to be an hour and a half installing them. It was easier then I expected. I already had the old pipes removed, so I spent my lunch time drilling a hole for the clamp pin and clamping the old tips onto the new pipes. After work it was just a matter of sliding (more like wrestling, they didn't slide in very well) the pipes into their slot, bolting them onto the exhaust port with a new gasket, and then re-attaching the tip sling. Once the pipes were properly installed I just had to drill new holes for the EGT (Exhaust Gas Temperature) probes and clamp them into place. That was that. Maybe I'll take some pictures of the engine tomorrow and then post them.
Its nice to actually accomplish something. Sometimes the frusterating thing about maintenance in aviation is there are so many inspections and not a whole lot of anything else. You spend an an hour ripping panels off and removing parts to look at what you wanted to see and say, "Yep, looks good". Then you turn around and have to put everything back together again. You almost feel better about the whole thing when you open something up to find it broken (money aside of course, when its your own airplane this is not so much the case), and then you can at least feel your efforts aren't in vain, and you can have the satisfaction of fixing it.
Wednesday, April 18, 2007
Near Miss
The rental pilot was flying ahead of me in the downwind (parallel to final approach leg, but flying opposite direction), with the other pilot on his base leg (90° to final approach leg). The rental pilot made a radio call indicating he was doing a gliding 180 maneuver, which is a commercial level maneuver that involves pulling all the power off in the downwind, and gliding down in a 180° turn to land. The rental pilot's first ignorant mistake was to practice things like that with other aircraft in the circuit. His second mistake was his complete and total disregard to where those other aircraft were. During his manuever, I watched the airplanes come easily within 2 wingspans of each other as the rental pilot cut off the other pilot as he turned to the inside of the other airplane. He was just not paying attention. He ended up landing to do a touch and go, and the other pilot decided at that point to overshoot.
Talking to the rental pilot afterwards I learned that he never even saw the other airplane until he was down and rolling on the runway as the other aircraft flew over top of him in the overshoot. I've never seen airplanes so untintentionally close to each other in flight. The rental pilot has a passenger onboard, his wife, who was completely oblivious to the whole incident until we mentioned it to the pilot on the ground. The worst part about it was the rental pilot thought it was funny when we mentioned it to him, and he never admitted any wrongdoing or took any responsibility for his actions at all. Apparently he has a reputation among the flight instructors for being ignorantly reckless. Even thinking about it now, 4 days after the event, it gives me a knot in my stomach. I almost saw people die - a pilot who had done nothing wrong, and a completely innocent passenger. All from a ignorant pilot's actions.
When I mentioned it back at the flight school after we were both on the ground, I asked him very gently if he had seen the other airplane, and didn't really comment on anything other then what I saw. I regret being so kind. The more I think about it, seeing how he reacted with no remorse, and with no intentions on making sure the event doesn't repeat itself, the more I wish I had chewed him out in front of his passenger and everyone else in the room. It very well could have been me he nearly smacked into. Ignorant, self-righteous pilots like that with no respect for the responsibility they carry should not be aloud to hold a license, and the flight school should not be renting airplanes to him. At least it ended safely, if only by sheer dumb luck. It makes me sick just to think that I could have witnessed the collision of two airplanes from a birds-eye-view, I'm not sure how I would have handled it had it actually happened.
Monday, April 9, 2007
Ignorance is Bliss
This presents a little bit of dilema for small airplane pilots, and can require a certain amount of good judgement to maintain the confidence of your passengers without comprimising their safety. It does become a little easier if you're operating single pilot however, which, fortunately, the vast majority of the time we are. The exception being if a fellow pilot is riding along left seat and you use him as a sort of simulated copilot (two sets of hands and heads are always better then one). In this case its always better to openly point out and discuss everything going on, so both persons have full situational awareness, and two knowledgeable brains can help work through the problem. Operating single pilot if you notice a small problem you can note it mentally and take the necessary actions or just monitor it silently as needed. The truth is small problems happen fairly often, but they usually don't cause reason to panic. Radios can act up, spark plugs can foul, carburetors can start to ice up. Usually its just a matter of taking the proper steps to fix or side-step the problem so it doesn't become a factor or monitoring it as needed to make sure things don't get worse. If they do we want to already be on top of them. But many passengers, especially nervous ones, if they notice that something isn't quite right, even if its a little something, can become far more concerned then need be. In those situations its difficult if not impossible to set them at ease simply by explaining the situation, (providing we can spare the time and attention at the moment do so) so I find for the most part its best to just try and not let them in on the problem, as long as their safety isn't jepardized by their ignorance. In this case its important to keep a confident appearance and at least appear that everything is fine and you're under control. If things worsen and the passengers have a need to know what's going on so they can react accordingly, that is an entirely different situation. But 99% of the time it never comes to that, so why worry them?
We'll use carburetor icing as an example. While fairly rare, it can and has happened to me. While not serious in the least if the correct actions are taken, it is not a normal part of the flight. I was taking a passenger up in the Cessna 150 once, and I could tell she was a little nervous. It was a little bit of a moist hazy day, and I pulled the carb heat out to check for icing. Sure enough, the engine started running just a little rough. Unfortunately I couldn't hide the change in engine sound from her and she visible jumped. I was a little concerned about the icing, at least until the carb heat could clear it out, but I didn't show it, and simply confidently explained that I pulled the carb heat out, which would cause the engine to lose a little bit of power do to the hot air. I neglected the part about possibly having an engine failure if I let the ice build up any more. She didn't need to know about that. In a couple minutes the ice cleared up, and everything went along as if nothing happened.
I guess its a matter of the cliche's "Knowledge is power" and "Ignorance is bliss". Non-pilot passengers often don't have the knowledge or experience to to fully understand whats going on, so as harsh as it sounds its best they don't know at all. Of course there are always exceptions. There are the passengers who have confidence in your abilities and the airplane and understand that minor glitches happen, and even if they don't fully understand everything, they do understand that most the time its no big deal because we always leave ourselves alternative options to take. In those cases providing you are able to take the time and give a commentary on whats going on, it can serve as an interesting learning experience, and can serve to boost their confidence even more. The trick is its important to know who those people are.
Tuesday, March 27, 2007
Little green dots
We did our usual flight to Sarnia to fly some ILS approaches, and the weather turned out to be a non-event for us, as there was a wide corridor of clear skies running from Sarnia to London. But we did get to fire up our fancy stormscope which I haven't had a chance to see working yet. For those unfamiliar with such a device, a stormscope measures electrical discharges within a cloud and displays them on a little round display in the form of a green dot relative to the position of the aircraft. How it does this, the best explanation I can give is its magic, but it works. The dots once they've appeared stay on the screen in the same place until the CLEAR button is pushed. They don't move around the display if we make a turn so we have to be sure to push CLEAR everytime we make a heading change, and let the Stormscope start picking up fresh discharges again based on the new relative direction. So if there is convective activity (which produces electrical discharges) within range of our stormscope (25-200 miles depending on the setting) the little green dots on the screen will accumulate enough after a couple minutes that we can make out rather clearly where the good weather is and where the bad weather is in relation to our position. Its really quite fascinating to watch the little green dots start to pile up and clutter the display screen. We could make out very well on the stormscope the squall line over kitchener, and the stormscope also picked up the cell of thunderclouds south near Chatham quite nicely as well. Since it was a clear day we could see the Cumulonimbus clouds building in the distance over Chatham, so we really didn't need a Stormscope to tell us to stay away from there, but the beauty of this instrument is if we were flying in IMC (or even just marginal VFR) and weren't able to see a great distance in front of us, we'd be able to detect any embedded thunderclouds in real time and effectively navigate around the bad spots.
There are two other types of weather detection equipment in common usage. There is the onboard weather radar, which usually has a dome mounted in the nose of an aircraft. This dome picks up the echo's of the radar signal off of any precipitation ahead of the aircraft, and can thus show you where the heavy spots of rain are, thus indicating thunderstorms. These units however are rather large, and expensive, and for the most part are only used on larger aircraft. The other type is also weather radar, but it draws its information from ground based radar stations and relayed to the aircraft by satellite. This is known as XM WX Nexrad Weather. Or just XM Weather. Or just Nexrad Weather. This type for the most part only requires a GPS unit capable of receiving it (with a small current paid subscription), and is thus relatively affordable compared to onboard weather radar, while achieving similiar results. It does have a few minor drawbacks however. Weather information on Nexrad weather is limited to the geographical regions that are covered by a working ground radar station. It is also dependant on a solid GPS signal. It also must be noted that the information given is not in real time. New radar images are transmitted to the GPS units every 15 minutes or so. This means with this system if the weather changes quickly, you'll no longer have an accurate picture, and weather can change very rapidly, especially when we're talking about thunderstorms.
The pros to weather radar of any type is that it is more useful all year round, and it will pick up precipitation of any kind - rain, snow, freezing rain. That is something our Stormscope cannot do. Save from installing a $30,000 onboard weather radar system in our little Twin Comanche - impractical if no impossible - it gives us some pretty good capability. It shows us a clear picture of up-to-the-second dangerous weather in real time, without being dependant on technology outside of the cockpit. Pretty dang cool if you ask me.
Saturday, March 17, 2007
May I Never See the Day...

That is a Twin Comanche that seen better days. Every airport has airplines like this sitting around. Airplanes that at one point have had some reason for its owners to abandon it and leave it to rot. In Sarnia there is an old V-tail Bonanza sitting behind one of the buildings in a pile of junk. I've always wondered about it - its history, and what happened to it that made it no longer worth maintaining. Its been sitting there for as long as I can remember, which goes back for at least 15 years. Airplanes like these always seem to be permanent fixtures of the airports. They've sat there for as long as anyone can remember and will most likely continue to sit there and decay for many more years. This one in the picture is missing the nose cowl, as well as the tail cone fairing at the back. Also judging by the way that its sitting on its tail in the grass I would imagine the engines have been stripped off it too. There are also very obvious signs of corrosion. This airplane has been dead for a very long time, and all I can say is may I never see the day my Twin Comanche looks like the one in the picture.
Tuesday, March 13, 2007
Ahh the Springtime
It was gorgeous out today. Warm and Sunny enought that for most the day we just left the hangar door open to enjoy the fresh air and sunlight. Around mid-afternoon I was working away and looked up to see James and Brian (my coworker and my boss) pushing a Cessna 172 into the hangar. Nothing too out of the ordinary, we have lots of planes coming in and out of our hangar all the time. Except something was wrong with the picture I was seeing. The airplane was tilted forward at a very unusual angle. That was because it had some slight nosewheel problems. Ok not so slight. The airplane as it turned out is pretty much a write off. Some student pilot and instructor somehow managed to impact the ground hard enough to push the nosestrut all the way up into the engine compartment. Only about 3/4 of the wheel was left exposed out the bottom of the airplane. The outer 4" of the props were folded back nicely. When we took the top cowl off to look inside, you could see the bottom bracket that braces the nose strut to the belly of the airplane had been ripped off its anchor points and folded up, and part of the firewall was crumpled along with it. The firewall is essentially the core of an airplane. That's what the engine mount is bolted to, and basically the rest of the airplane is run into or back from that point as well. It's pretty much the strongest part of an airplane. The bolts that mount the top part of the nosestrut to the firewall were also all sheared off as the strut was pushed up further into the nose.
Needless to say it was not something you see everyday. I wish I could post some pictures, but I probably shouldn't, as a certain amount of annonymity is probably good at this point. The plane doesn't belong to anybody I know, apparently its from a flight school in the Toronto area. Both student and pilot are ok. I feel bad for the instructor. It will probably be bad news for him, but for all we know there may have been little he could have done. If a student lacks the finess to land properly, and things start to go bad close to the ground, sometimes there's precious little time for the instructor to intervene and regain control of the situation. Then again it could be all the instructor's fault. I didn't see it happen, and I wasn't there, so I can't really comment. It was certainly interesting to see an airplane in that kind of shape coming into our hangar however.
Monday, March 12, 2007
More Hard Work
We tuned into the Goderich NDB and made our way north, with me flying heads down on instruments the entire way. We were flying through some light rain showers but for the most part it was relatively clear. I wasn't wearing a hood or foggles or anything, but I wasn't aloud to look outside. Typically you're supposed to wear something that obstructs your vision to everything except the instruments to simulate instrument meteorlogical conditions (IMC), but its really not that hard to resist looking outside as long as you concentrate on the panel.
Actually its so easy to focus on the instruments that I can entirely forget about everything else - that is until Frank makes some off-handed comment about the weather outside or some landmark on the ground, which then I reflexively look up. Doh! As long as Frank keeps quiet though I quickly become lost in my instrument scan: Attitude, heading, altitude, ADF. Attitude, heading, altitude, ADF.
This all comes fairly naturally, its just about reading the instruments and making the necessary corections. The NDB approaches we did today were a different story however. I won't go into the gory details of how its supposed to work and proper procedures, but it is DIFFICULT. Its not nearly as straightforward and intuitive as flying an ILS, but requires a certain amount of spatial thinking - picturing where you are based on the position of the ADF needle versus the aircraft's heading. We flew three approaches and each time I becames so entangled in trying to wrap my mind around what was supposed to happen, and what was actually happening, that I completely forgot that I actually had to fly an airplane at the same time. One attempt I neglected my pre-landing checks, and another time I forgot about descending down to the next step down altitude until it was too late. At that point I was trying to rapidly descend and slow down at the same time before I missed the airport altogether. Descents and reductions in airspeed don't go well together at all. While doing that my attention was diverted from the navigational part of the approach, and I forgot about my final turn after I passed the NDB. I was marginally improving though. By the third one I had the concept of the NDB approach down in my head better. I'm sure when we go up again and get a couple more attempts in I'll have it more solidified in my head. Once I understand completely how its supposed to work, I'll have a fighting chance at actually getting the airplane to do it. I managed to prove today however that if you become too focused on getting one thing to happen right and forget about all the other things you have to worry about things can quickly spiral out of hand.
Today's flight again took so much work to learn and perform what I was being taught, but that is so much fun. I haven't had this kind of fun in an airplane in a long time, its so refreshing.
On a side note, on the way back to london we had a substantial tailwind, and the GPS was showing a groundspeed of 185 kts, or 213 mph. "200 mph club" baby.
Thursday, March 8, 2007
Heads Down
 I went flying with Frank yesterday. We went down to Sarnia to fly some ILS approaches. It was quite the challenge, and its going to be refreshing to get back into some training that is constantly pushing my limits. Practicing ILS's involves flying the localizer/glideslope down to our decision height, pretending we don't see the airport, then flying the missed approach procedure, back to the NDB, doing a procedure turn to reverse our direction, and then intercepting the localizer and glideslope to try again. That last sentence I'm sure made no sense to any of my readers, and up to a little while ago, it would have made no sense to me either. So I will proceed to decipher what I just said.
 be. The horizontal needle gives us glideslope information. If we are below the proper glideslope, the needle will be deflected up, showing us the proper glideslope is above us. Naturally if the needle is deflected down, we are above the proper glideslope, and if the needle is in the center, we are on the glideslope. The localizer needle, the vertical one, works on the same principal. If it is deflected left, we are left of the runway centerline, and visa versa. The indicator shown here is both on the runway centerline, and on the correct glideslope.
Assuming we are in actual IMC (instrument meterological conditions), as in we can't see jack out the windows, and we're flying the ILS down the runway, there has to be a point somewhere that if we still don't see the runway, we have to call it off. That is called our decision height. A t Sarnia the decision height for the ILS approach (there are other types of approaches which I'm sure I'll learn eventually) is 200 ft above airport elevation. So as we're descending down along the glideslope, when we reach an altitude of 794 ft ASL (200 ft above the ground), we look up. If we can see the runway in front of us, we land the airplane. If we still can't see anything, we have to execute a missed approach. A missed approach is a procedure to climb out, return to the beacon, and set up for another try. In Sarnia the procedure is a climbing right turn back to the NDB. Now as we're homing back to the NDB, we're going to be traveling in the opposite direction we want to be to set up for another landing attempt. This means we have to do a procedure turn to turn us around. This involves flying away from the NDB on the reciprocal runway heading (rwy 32 at Sarnia is 324°, so we fly a heading of 144°) for 60 seconds, turning left to a heading of 099° for 45 seconds, and then making a 180 back around until we intercept the localizer.
All of this may seem overly complicated and unnecessary when if we have a GPS all we have to is use it to fly where we need to be, but these system of doing things was established long before GPS's existed. Without a GPS, and with no visual reference of where we are, we need some sort of standard practice to ensure that we will be able to find and align ourselves with the runway. Its easy to know where we are when we are looking at a little map with a picture of an airplane on it showing us where we are, but visualizing our position becomes much more difficult when we don't have that birds-eye picture, and we can't see outside. We have to be able to find our way around using only our ADF and ILS.
Understanding how the approach works is one thing, actually being able to fly it is another. Learning to track a localizer and glideslope down to the runway accurately is going to take a little practice. Yesterday I had three attempts. I'm sure on my first attempt if someone was watching us on radar they might have thought I was drunk. I was swinging wildly back and forth across both the localizer centerline, and the glideslope. Its difficult to find the sweet spot that will keep the needles centered - it takes anticipation. We use power to control our glidepath, meaning if we're below the proper glideslope we add power, if we're above, we take some away. It'd be below so I'd add a little bit of power to get back to where I should be, then I'd overshoot the glidepath and be too high, which would require a reduction in power. It took a little bit of practice to learn to anticipate when I needed to reduce or add power to end up stabilizing the descent rate with the needle centered. Each attempt was better then the last. It was some of the most intense flying I've done in a while.
Its really cool to be learning new things and pushing my flying skills into new levels. IFR flying has always seemed like such a daunting thing to me, as it does to many other VFR only pilots. I love the fact that I'm starting to dive into it. It requires so much more precise control of the airplane then VFR flying has ever required, and there's also new concepts, and new things I have to learn. Its so exciting to think about.
Thursday, March 1, 2007
Gear Up Now or Later?
It was a beautifully clear day, free of any turbulence whatsoever, and we decided just to do some circuits to give me a break from the intensive engine-out training I have been doing, and to give Frank a chance to familiarize himself with the airplane. Everything went well, but he mentioned something about the retraction of the landing gear on take-off that we had learned differently. The take-off procedure I had been following based on the recommended procedures in the POH and according to what I had been taught were roughly as follows: Rotate at 80 mph, accelerate in ground effect until Vy (112 mph), climb out at Vy, retract gear when there is no longer enough runway to land, set climb power. Frank, who learned in the Seminoles at Empire Aviation, mentioned that I should retract the gear to get cleaned up as soon as we verify a positive rate of climb.
These two different techniques have two different underlying philosophies behind them. The technique I have been using, where we retract the gear as soon as we run out of runway, uses the philosophy that if we have an engine failure, and we still have a chance to get back onto the ground and stop, do it, even if we're already airborne. Once we've retracted the gear then we're committed to going flying. The philosophy behind Frank's technique, is that as soon as we start the climbout, we've committed to being airborne, so we want to ger cleaned up as quickly as possible to minimize the chances of an engine failing while we still have junk hanging out under the airplane.
Thinking about these two different ideas I realize there's pros and cons to both techniques. My technique reduces the chances of us having to successfully fly an entire circuit on only one engine, which historically, has proven difficult for many pilots. The con would be that it requires very good judgement on just exactly how much runway we need to sink back down, land, and stop - especially if we've climbed a fair amount above the runway. That can definitely be difficult. Underestimate the airplane's required distance to stop and we end up in the weeds past the runway. The other technique makes the decision making easier: Positive rate of climb, retract the gear, ok we're going flying no matter what. But it makes the assumption that the pilot will be able to maintain control of the airplane and make it climb in the current conditions. Light twins are notoriously bad in the single engine climb performance. The single engine climb performance of the Seminole at gross weight and sea level is listed as 212 fpm. That is not much to work with. The Twin Comanche is only marginally better at 260 fpm (with only two of us onboard during training I've seen up to 600 fpm). That is assuming proper pilot technique - climb at Vyse (aka Blue Line), with gear and flaps retracted. The second technique also just ignores any runway left over, which in reality isn't the safest action. If you have enough runway its safer to land then to try and climbout, fly the circuit, and return for a landing.
I guess the risk-reward is different too, at least if the engine fails at the initial stages of take-off. The technique I have been taught carries a lower risk, lower reward. If I misjudge the distance needed to land and stop, I may end up over-running the runway. The airplane may be wrecked, but chances are I'll be ok, since we're just rolling off the runway. The other technique carries a higher reward, higher risk. If done properly, the airplane as well as everybody onboard will be just fine, but it may require a higher degree of skill to acomplish. Any mistake, and the results could be ugly.
Of course if we're operating from a shorter runway where there's not much left-over after we become airborne, the two techniques essentially become the same, and there's no argument. With long runways like at London however, I like the technique I have been taught and I think I'll stick with it.
Sunday, February 25, 2007
Multi-Engine Ride
Although I passed my flight test, I didn't do as well as I had hoped. There were some things at the beginning of the flight that I missed which I should not have screwed up, but I'm chalking that up to nervousness, and flying at an unfamiliar airport. There were some other things during the flight test that I didn't do well on because we didn't go over it during training, and there was no procedure laid out for it in the Flight Manual. Oh well, at the end of the day I have the rating in my hand and the examiner made it a learning experience for me as well.
I think however that I learned more about my skills on the flights to and from the flight test then I did during/after the flight test. I am based out of London, and we took the flight test in Brantford, which means we had to make the short cross country hop to and from. This was actually the first time I've done a cross country flight in the twin. And as it turned out, when we climbed aboard on our way to Brantford, Richard realized he forgot his headset, so rather then going to get it, he didn't bother and just trusted that I was capable enough to handle things on my own. So it was kind of like a first solo flight.
As much as its a nuisance to have to get 50 hrs dual time to appease the insurance companies, even though I'm multi-engine rated now, I think I'm going to side with the insurance company. The truth is that although with my 13 hrs of twin time I may be safe to operate a twin 98% of the time (which included the time during my flight test, hence the pass), I don't think I would be able to keep up when things become less ideal. There are always distractions that can pull your focus away from your cockpit duties: Talking passengers, ATC trying to communicate, minor problems with airplane systems, another airplane doing something unusual/retarded, even just stress. All of these types of things can have a tendency to pull your attention away at the worst possible moment, and then you forget to do something, or do it wrong. Even in the Cessna 150 I remember having difficulty focusing on my landing approach with a chatty passenger.
The kind of proficiency required to be safe 100% of the time can only come with flight time in the airplane, and as of yet, I don't have enough. So despite the torment of being multi-engine rated but not yet being allowed to fly my own airplane, the insurance companies actually do know what is required to be safe, so I'll gladly go along with it.
Monday, February 12, 2007
Transportation vs Passion
That motivation of flying to get somewhere completely changes the type and frequency of flying between those who fly as transportation, and those who fly just because they love it. First of all, like I mentioned, the motivation to get somewhere prompts the purchase of a high performance airplane. A Cessna 150 is hardly useful for getting somewhere. Naturally the draw is towards faster, and inevitabley more complex and difficult airplanes. There is also another trap that can compound the problem. This pilot, who has just earned his Private Pilot License has grand plans of seeing the world using his new-found skill, and he purchases a sleek Mooney M20. But he only travels once a month or so, so he doesn't fly much. He's a conscientious pilot, and takes safety seriously, but the truth is his skills and experience level are likely far below the airplane he flies. Compare that to the recreational enthuisiast who loves to fly. He doesn't have a reason to go anywhere, except for maybe those hamburgers and the occasional fly-in during the summer, so he buys a Cessna 172, about the same time as the first pilot buys his Mooney. The C-172 is fun and friendly to fly, economical, and it can get somewhere in a reasonable amount of time if it has to. He's also out flying almost every weekend, even if its just to go poke around in the air for no good reason other then he just loves to be up there. He eats, sleeps, and breaths flying.
I think the difference between these two types is becoming clear. Skip ahead now a couple years in the lives of our two pilots. The enthusiast pilot with the C-172 has now amassed a considerable amount of flight time. He can fly the pants off that 172, has a good eye for weather, and he's collected a few of his own stories too. And now he's ready to move up to a more complex airplane that can once again challenge his skills. He goes for a test flight in a Mooney and after just an hour of flying in it he can fly the Mooney better then the pilot who has owned it for much longer.
The National Transportation Safety Board reports are riddled with low time pilots who have crashed their high-performance singles. I think the importance of experience in a simpler airplane shouldn't be overlooked by anyone. Even for someone interested in owning a fast cross country airplane should consider flying a simpler airplane for a considerable amount of time before stepping into something faster. Flying skills are very transferable between airplanes, and I think taking the long way and enjoying the journey before going all out is well worth the time.
Wednesday, February 7, 2007
Unlocking the Mystery
It reminds me of a certain memory I have during primary training. This happened more then four years ago now I think but I still remember the experience vividly. This was a fair amount of time before my solo. We were doing circuits in C-GEBW, the flight school's Cessna 150. I was at the point where I was just flying the airplane, and Paul would do the pre-landing check (Master on, Mags on, fuel selected on, carb heat hot, mixture rich) for me in the downwind and was probably dropping the flaps for me as well on the base leg. I remember I was concentrating very hard on holding my alititude and keeping a straight downwind leg, and Paul decided it was time for me to handle the entire workload. I called for the pre-landing check, and instead of agreeing it was time and doing it, he just said something like, "Why don't you do it this time?." So I said, "Ok, do you have [control of] the airplane?" He just declined to take control and said I was doing fine. The first time I felt a little overwhelmed - I have to FLY the airplane AND do the downwind check on my own!?! I chuckle at it now, because the pre-landing check in the 150 takes less then 5 seconds to do, so its really a non-event, but at the time it was a real challenge to carry that out while not letting the airplane wander at the same time. After a little more practice I soon learned to handle both tasks safely and efficiently. Its funny to look back and remember the challenge it was to fly a simple little C-150. Back then Cessna 150's were still complex and mysterious in my mind's eye. Now it seems like there is nothing to them. The challenge of unlocking that mystery is a richly rewarding process.
It has been the same with learning to fly the Twin Comanche, except on a slightly smaller scale. I remember my first flight in C-FINY when we were down in Texas looking at it as a possibility to buy it. It was thrilling to get to fly in it, and it was also so far above my head. The physics of single engine performance, like Vmc (Minimum controllable airspeed with one engine inop) and blue line (Vyse, airspeed for best rate of climb on one engine) were all a mystery to me, as was flying an airplane with a constant speed propellor and retractable landing gear. I had never done it before, and I hadn't a clue how any of it worked. Those mysteries are starting to be unlocked, but I still look forward to the time when I have completely mastered the airplane and can look back on this point and chuckle at how green I still was.
There are also more things that are still a mystery, like IFR flying that I can look forward to unlocking.
Saturday, February 3, 2007
Crosswind Landings
There's two techniques you can use to correct this: The crab method and the wing low method. The crab method is much more difficult and requires precise timing with small aircraft (larger jets have a better time using this), so it is not often used. The wing low method is mainly what is being taught for light aircraft, so that is the method I'll explain.
To align the wheels when landing using the wing low method requires the use of both aileron and rudder. You use the
 ailerons to bank into the wind, and then opposite rudder to align the nose with the runway. This results in the upwind wing being slightly lower then the other one, which also means that the upwind wheel will touch down first. Naturally the stronger the crosswind the more crosswind correction is required, and the more difficult it becomes.
Today I went up for another lesson in the Twin Comanche. We just reviewed the usuals: steep turns, engine failure in cruise, and engine failure in the overshoot. We also did some circuits, and the air was incredibly bumpy, and the crosswind was nuts too. We were using runway 27 with the winds at 230° at 22 kts gusting to 27. That works out to about a 14 to 17 knot crosswind. Officially the strongest crosswind I've ever flown in. The crosswinds were just about at my personal limits, and they were just on the verge of the airplane's limits too. Richard said I did very well. One landing I had to use full rudder deflection to keep the wheels straight and tracking the runway as we touched down, and it was difficult to maintain directional control after touchdown before we had slowed completely as well. I wouldn't call those crosswind conditions fun, but they were certainly a challenge I was glad I took on. It was quite the adrenaline rush.
With gusty conditions it is impossible to hold the nose steadily aligned with the runway, so timing becomes more critical as you try to touch down at the moment the nose is aligned properly. Your feet are on the rudder pedals kicking back and forth trying to counteract the wind gusts, your right hand is ready on the throttles, and the left hand is on the yoke working the ailerons opposite to rudder direction and making pitch adjustments to keep the airplane in the flare ready to touch down as soon as the nose is straight. Its important that we don't let the airplane touch down until the wheels are aligned with the direction of motion, and its tricky when the wind gusts are blowing the nose back and forth. Quite the challenge, but those are the moments pilots live for - to conquer the airplane even when the elements turn against us.
Tuesday, January 16, 2007
Density Altitude and True Airspeed
Density Altitude is a phenomenon that is drilled into every pilot's head right from the start. Defined it would be the altitude that a given mass of air most closely resembles in terms of the air density of the Standard Atmosphere. Simply speaking, that means that if the density altitude of the air at sea level is 2000 ft, it more closely compares to the air density a Standard Atmosphere would have at 2000 ft. A Standard Atmosphere is simply the yardstick aviation uses to compare the properties of air from day to day. A Standard Atmosphere is where at sea level the air temperature is 15° C. Now as we know as air becomes warmer it becomes less dense. That would mean that a 20° C day would have a higher density altitude then a Standard Day. Humidity also affects density altitude - the more humid the air, the less dense it is.
This matters to pilots because an airplane's performance is very closely related to the density altitude. The thinner the air becomes, the less power the engines are able to produce, and the less lift the wings produce. Thin air can also be a good thing, because with it comes less drag, so airplanes are able to fly faster with less resistance meaning better fuel economy. Thinner air also means that all the V-speeds increase. Vs (Stall speed) is higher, Vy (Speed for best climb rate) is higher, Vr (takeoff rotation speed) is higher, etc. It is important to note that it is the True Airspeed (TAS) that is higher, the V speeds in terms of Indicated Airspeed (IAS), which is speed read off the the airspeed indicator, do not change. That is because all IAS is is a reading of pressure difference between normal atmospheric pressure (static pressure) and the ram air pressure measured in the pitot tube. That means it doesn't matter if the air density changes, the difference stays the same. TAS is the speed at which the airplane is actually moving through the air. TAS increases as Density Altitude increases.
This all means that in a high Density Altitude situation, like on a hot 30° C, high humidity day, the airplane is going to be producing less power, and need to accelerate to a higher True Airspeed to take-off. Climb Performance will also suffer. That is why the effects of Density Altitude are drilled into pilot's heads. If they do not calculate the Density Altitude, and apply it to their airplane, they could very well end up expecting the airplane to perform better then it is able, resulting in running out of runway on take-off, or not being able to climb above the trees in time. When an airplane's ceiling is mentioned, that altitude is in Density Altitude. The airplane doesn't really care what altitude it actually is at, only the altitude it thinks its at. If we're overflying a mountainous ridge for example, with the peak at 12000' true altitude, and the airplane's ceiling is listed as 14,000', on a Standard Day of 15° the airplane should be able to fly over the mountains, but if its a hot, humid day, with a Density altitude at sea level of 3000', that means the airplane will perform as if its 3000' higher then it actually is. Meaning it will only be able to climb to 11,000' and it won't make it over the 12,000' mountain.
Density Altitude is a very important concept for a pilot.
Balanced Field Length
Balanced field length is a little different then takeoff ground run distance. The Balanced field length as I mentioned at the beginning takes into account the runway needed to operate a twin engine airplane safely even if it were to have an engine failure at any point during the take-off. That means adding on extra runway length to account for having to stop the airplane if an engine were to fail during the takeoff roll on the ground, or in the case of larger airplanes, the extra length required to continue accelerating to takeoff if there is no longer enough distance to stop.
Larger airplanes use a pre-flight calculated V speed, denoted V1, as their takeoff decision speed. If an engine fails below this speed they are going slow enough and have enough runway to shut down the remaining engines and stop. Above this speed, and they no longer have the space to stop and are therefore committed to taking off, even if they're still on the ground. In a light twin such as ours, we don't use the V1 system because the airplane doesn't have the power to continue a takeoff on only one engine if we're still on the ground. This means that if we are still on the ground with an engine failure, we have no choice but to retard the throttles and stop. We may also even have to re-land and stop on the remaining runway if we have just taken off and have an engine failure before we have attained our best rate of climb speed and have the landing gear up. The landing gear down causes extra drag and our airplane may not be able to climb on only one engine with it down. Therefore our light twin balanced field length takes this into account. Many light twins have Accelerate-Stop charts in their Flight Manuals, which denote how much distance will be used to accelerate to a given airspeed, and then slow to a stop. My Twin Comanche doesn't have a chart like this, so we are forced to estimate it... OR, like I have just spent my entire last night doing, we can develop our OWN accelerate-stop distance charts using two different charts given in our Flight Manual, and a little math.
The chart I have just developed, I should point out, is an unapproved aircraft performance chart, and it has been untested. So I would certainly not wager mine or my passengers lives on it. It did however serve to be good brain excercise, and I do think it would probably fairly accurate if it actually was tested.
So here's what I did. Please any math/physics savey readers who have some suggestions/comments/rebutals, please, by all means, speak up. Anyways, my existing flight manual has two charts I used data from: Takeoff Ground Run Distance, which gives the distance required to accelerate to 80 mph and liftoff, and the Landing Ground Run Distance, which gives the distance required to stop given a touchdown speed of 70 mph. Now we can't really just add these two distances together, because they are in reference to two different speeds, and the resulting distance also wouldn't account for the extra distance we'd need if we were lifted-off, but still accelerating just above the the runway to our best rate of climb speed (Vy) of 112 mph, as is standard takeoff procedure (Accelerate to Vr of 80 mph, rotate and liftoff, accelerate just above the runway to Vy of 112 mph, climb out at that speed and retract the gear). So first of all we need to extrapolate the distances to a higher airspeed. To do this, we have to find our curve of acceleration, which I have charted on a Speed vs Distance graph. Since we know the engines are outputting a constant force, and we know that as speed increases, drag increases to the square of speed, so I think a curve somewhere along the lines of D=V^2 should be a good representative of both acceleration and deceleration seperately, where D equals distance travelled and V equals aircraft speed. I also had to calculate a stretch factor to make the curve fit the data given in the Flight Manual. To do that I used the speed given, divided by the distance given to calculate a stretch factor to make the curve fit the data. I then divided the stretch factor into the calculated speed, giving me this:
Dc = Vc^2/(Vg^2/Dg)
Where:
Dc = Distance calculated
Vc = Speed calculated
Vg = Speed given in charts
Dg = Distance given in charts
Now I can go to the charts in the flight manual to look up the distance needed to accelerate to 80 mph with a given aircraft weight in a given density altitude, to calculate the estimated distance to accelerate to a higher airspeed. For my chart I chose to calculate the distance needed to accelerate to 100 mph. I chose that airspeed because our best rate of climb with a single engine operating is 105 mph, so below that we would have to be able to stop, above 100 mph, we should be able to accelerate the last 5 mph and climb out.
So then I had to go through each density altitude and weight combination listed in the flight manual charts, find the resulting distance to accelerate to 80 mph, and plug that into my formula. Example:
2000 ft density altitude, at gross weight, showed 1500 ft ground roll to 80 mph.
Dc = Vc^2/(Vg^2/Dg)
Dc = 100^2/(80^2/1500)
Dc = 2344 ft required to accelerate to 100 mph.
I then used virtually the exact same method to calculate stopping distance from 100 mph, and added the accelerate and stop distances together, to get my estimated balanced field length.
That would mean that IF (big if) the formula is correct, I would be able to use a runway as short as the calculated balanced field length and I could have an engine failure at any point during the take-off and still have enough runway to safely land and stop below 100 mph or climb away above that speed.
Like I said that was simply a problem I did for fun and there is no guarentee those numbers are correct even IF my understanding of math and physics is correct. So I would never actually try to pass them off as true, and wouldn't recommend myself or anyone else try to use this method.
Saturday, January 13, 2007
Bad Habits
The proper procedure for touch and goes is fairly simple, after all three wheels are down, flaps come up, and you go to full power and start your takeoff again, without stopping. I learned a hard lesson about procedures done in the right order. Flying touch and goes in the Cessna 150, the proper procedure is still flaps up, power to full (and then carb heat as well), but since its a slower airplane, with less power, and less travel throttle, you can sometimes get away with going to full power first, and then bringing the flaps up. That's simply because it doesn't take very long to push the power in and a Cessna 150 doesn't accelerate very fast either, so there's plenty of time to do it in either order before the airplane wants to go flying. However in the Comanche, the process of going to full power takes around 4-5 seconds from idle, and the airplane accelerates very rapidly.
Now this landing yesterday I had just touched down with a little bit of power, and while we were rolling along, I decided I'd push the power forward first and get us accelerating first to save us runway and then I'd bring up the flaps. That was my first mistake. As we started to accelerate and my hand was still on the throttle the airplane started to veer back and forth almost uncontrollably left and right. What was happening was what's called wheelbarrowing. That is when the weight comes off the main wheels, or off the ground completely, and shifts to the nose wheel. This can happen in any airplane from the pilot trying to hold it on the ground when the airplane wants to go/stay flying. In the Comanche due to the nosegear being longer then the mains, it can also happen if you try to takeoff with flaps. Normally in the Twin Comanche with no flaps rotation speed is around 90 mph, and the airplane will come off the ground with very little back pressure. So since we had the flaps down, it was trying to come off the ground much slower. It was essentially lifting most of the weight off the main wheels but keeping the nose down, since flying with flaps causes a much more nose down attitude. If I had immediately recognized my mistake I could have given some back pressure, gotten airborne, and we'd have gone flying. Instead I fought to maintain control on the ground because we hadn't reached the Vr (rotation speed) I had in my head. As this was all going on I think I said something like this, "Power to full... whoa... what the heck is happening!? ... flaps up!" My instructor, Richard, answered my question about the same time I did, and he flicked the flaps up for me. At that point we became airborne and everything turned out ok. I turned to Richard after during the climbout and said sheepishly, "That was pretty scary!". He just smiled at me and didn't say anything, aware that I knew where I had gone wrong.
That was a little bit of a lesson the hard way on bad habits. Flying a slow, forgiveable airplane its easy to get into bad habits, like following procedures in the wrong order. A Cessna 150 will let you get away with it, but a faster airplane like the Twin Comanche will bite you. The moral of the story is follow the proper procedures in the right order!
Wednesday, January 10, 2007
How different wing types affect handling
 The wing camber refers to the shape of the wing if you were looking at it from the end. A high cambered wing is very curved on the top, and thick from top to bottom, whereas a low camber refers to a very flat wing. A common misconception is that a high cambered wing produces more lift. While this is right I suppose in a roundabout way, that specific wording is rather misleading. The thicker camber improves airflow at high angles of attack, therefore a thicker wing will be able to fly at a higher angle of attack without stalling. The higher angle of attack is what actually produces more lift. Camber can also be on the bottom of the wing, which improves airflow when the wing is inverted during aerobatic flight. A camber is NOT required to produce lift. Another flat out wrong concept that is taught is that the air on the top of the wing has to meet up with the air on the bottom. That's not true, in fact, since the air on the top is accelerated, it actually ends up further back then the air on the bottom. This is due to a concept called circulation, which I am not going to take the time to explain. For more information, check out this great website.
So a thicker camber has two effects: It allows the aircraft to fly at higher angles of attack which produces more lift - and it also increases drag. A thinner camber is just the opposite, less lift, less drag. The more lift a wing produces, the slower the stall speed will be.
The wing chord refers the distance between the leading edge and
 trailing edge of the wing. And the aspect ratio refers to the ratio between the wing chord and wing length. A high aspect ratio, between a long, thin wing (from front to back) actually produces LESS induced drag (drag produced as a side-effect of lift) then a low aspect ratio wing. That's why you always see gliders with incredibly long, thin wings, to produce the most lift possible with the least amount of drag. The shorter wing in a low aspect configuration generally gives greater roll rates, and the shorter wing means stronger construction.
There is one last term we'll go over before we start putting together all these different aspects of wing design together. That is wing washout. A washed out wing has a certain amount of twist built into it. The farther you get to the tip, the more the wing is twisted with its leading edge down. What this serves to do is increase the angle of attack of the wing near its root, and decrease it near the tips. Now if you remember, a wing will stall at a certain angle of attack, usually around 16-18 degrees (depending on the camber). That means that if the wing root has a greater angle of attack, it will stall first, and then the stall will work its way out to the tips. This has two advantages: The ailerons, which are on the outermost portion of the wing, will still have an affect even when the innermost portion of the wing has stalled. This helps to maintain control of the aircraft. Also, it makes for a much gentler stall when part of the wing stalls first, and the stall works its way across the rest of the wing. This is preferable to the entire wing stalling at the same time, and dropping like a rock. Nearly all wings have some sort of washout designed into them, and its disadvantages, as far as practical flight handling goes, are negligable. Therefore this is far as they will be discussed at this point.
Airplanes designed as a high speed cross country machine usually use high-aspect ratio, low camber wings. The long slender, thin airfoil gives lots of lift and very little drag; perfect for efficient cruising, however the sacrifice is made in slow speed handling and can often be tricky to l
 and. The thin camber generally gives abrupt, unforgiving stalls at higher airspeeds then a thicker camber, and the minimized drag means it takes a long time to slow down. This requires more planning during the landing phase. It also means that if airspeed is not precisely controlled, a too fast approach will cause the airplane to float in the flare, chewing up runway until the airspeed dissipates. The Piper Twin Comanche, and any Mooney aircraft are great examples of high-aspect, low camber wings.
 higher induced drag cause the airplane to slow down much quicker, and the short wings will make it sink faster. This makes the landing phase much easier to deal with. Less then perfect airspeed control is not as much of an issue since excess airspeed will be bled off much quicker, giving a greater margin for error.
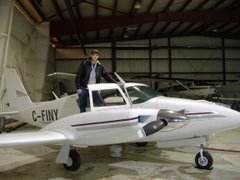


